初めての段取り
ここでは、「製品の開梱」から「アジフィルの開始」までをご案内します。
アジフィルの取り付け
注意
指を挟み込む危険があります。容器とアクチュエータベースの間に指を入れないでください。振動中は機械に触れないでください。
アジフィルの取り付けと配線
ベースプレートの穴に4本の M6 ネジでアジフィルを固いベースに固定してください。詳しくは、 アジフィルの取り付け方法 を参照してください。
オプションの 電源ケーブル を使用して、アジキューブを DC電源24V に接続してください。
重要
接続する前に、DC電源24V のプラグの極性が正しいことを確認してください。
注釈
詳しくは、 電気的インターフェース を参照してください。
Wiring for interacting with Asyfill
There are two ways to interact with your Asyfill. If you have a complete setup with an EYE+ Controller, we recommend connecting your Asyfill to EYE+ using the Ethernet port on the back. Please refer to EYE+ documentation for more information.
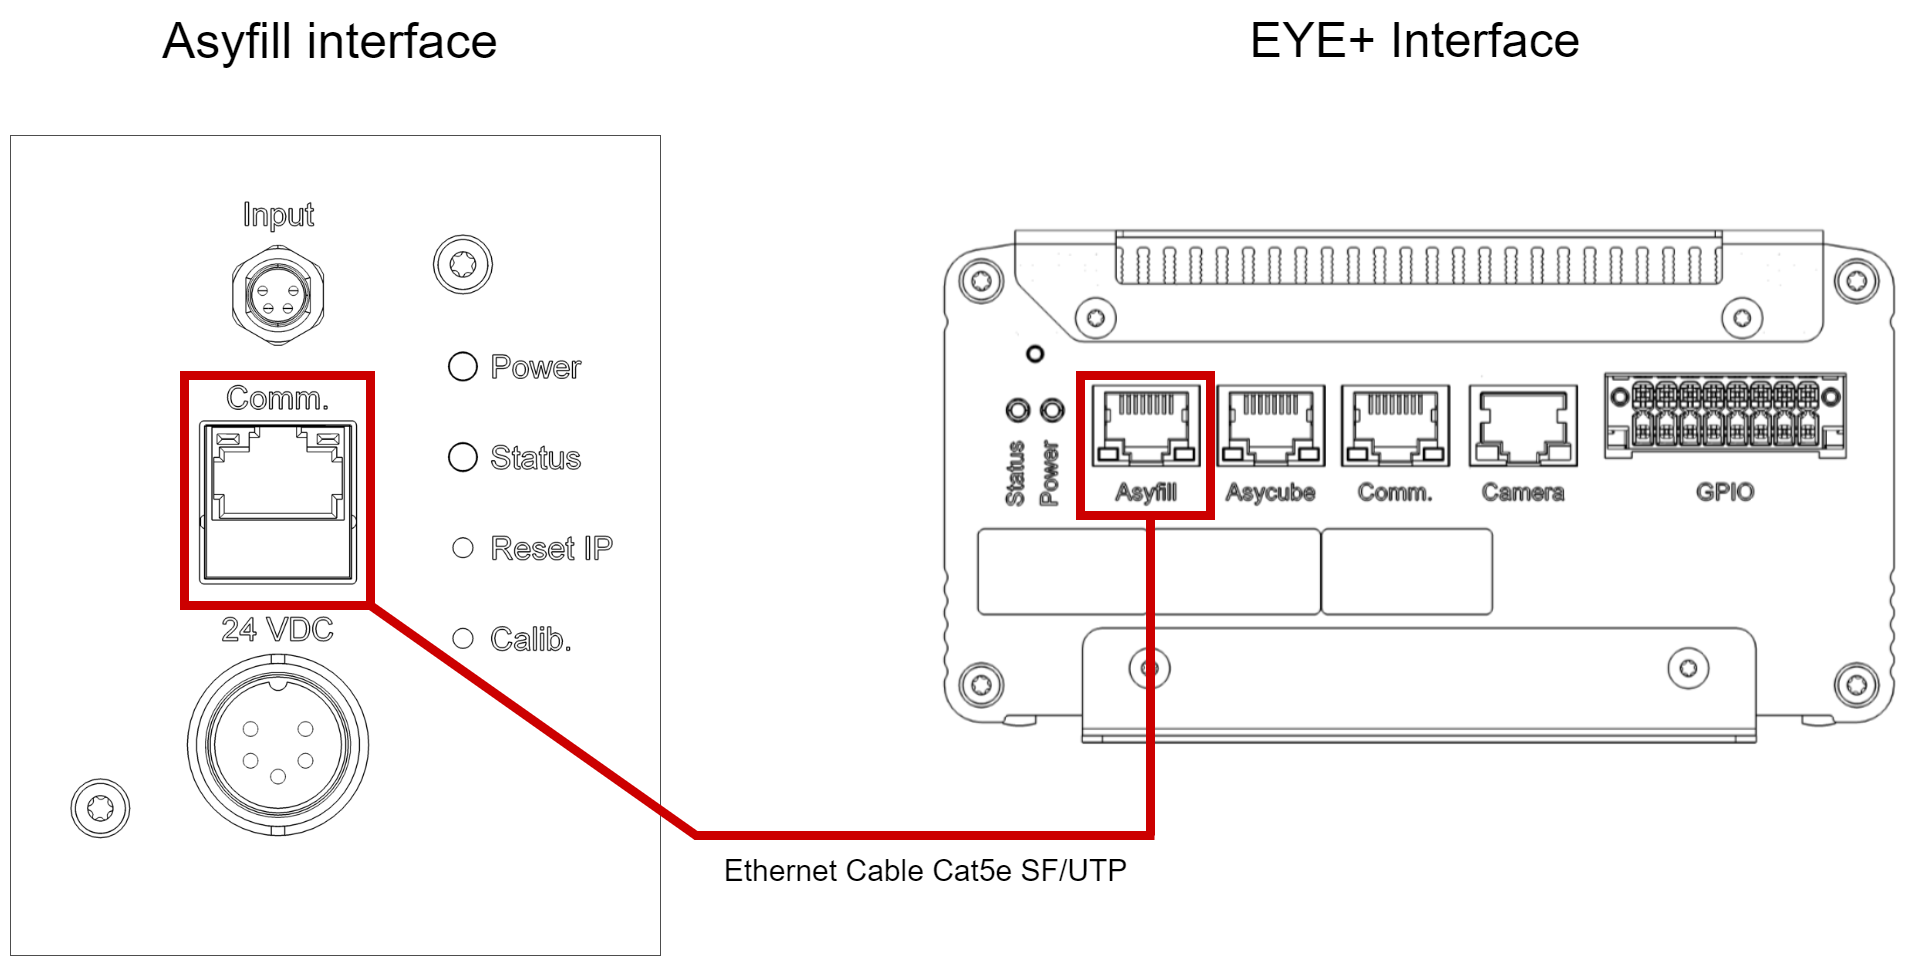
図 3 Connection with EYE+
If you do not have EYE+, you can connect your Asyfill Input interface to one of the Asycube OUT port using a I/O cable.
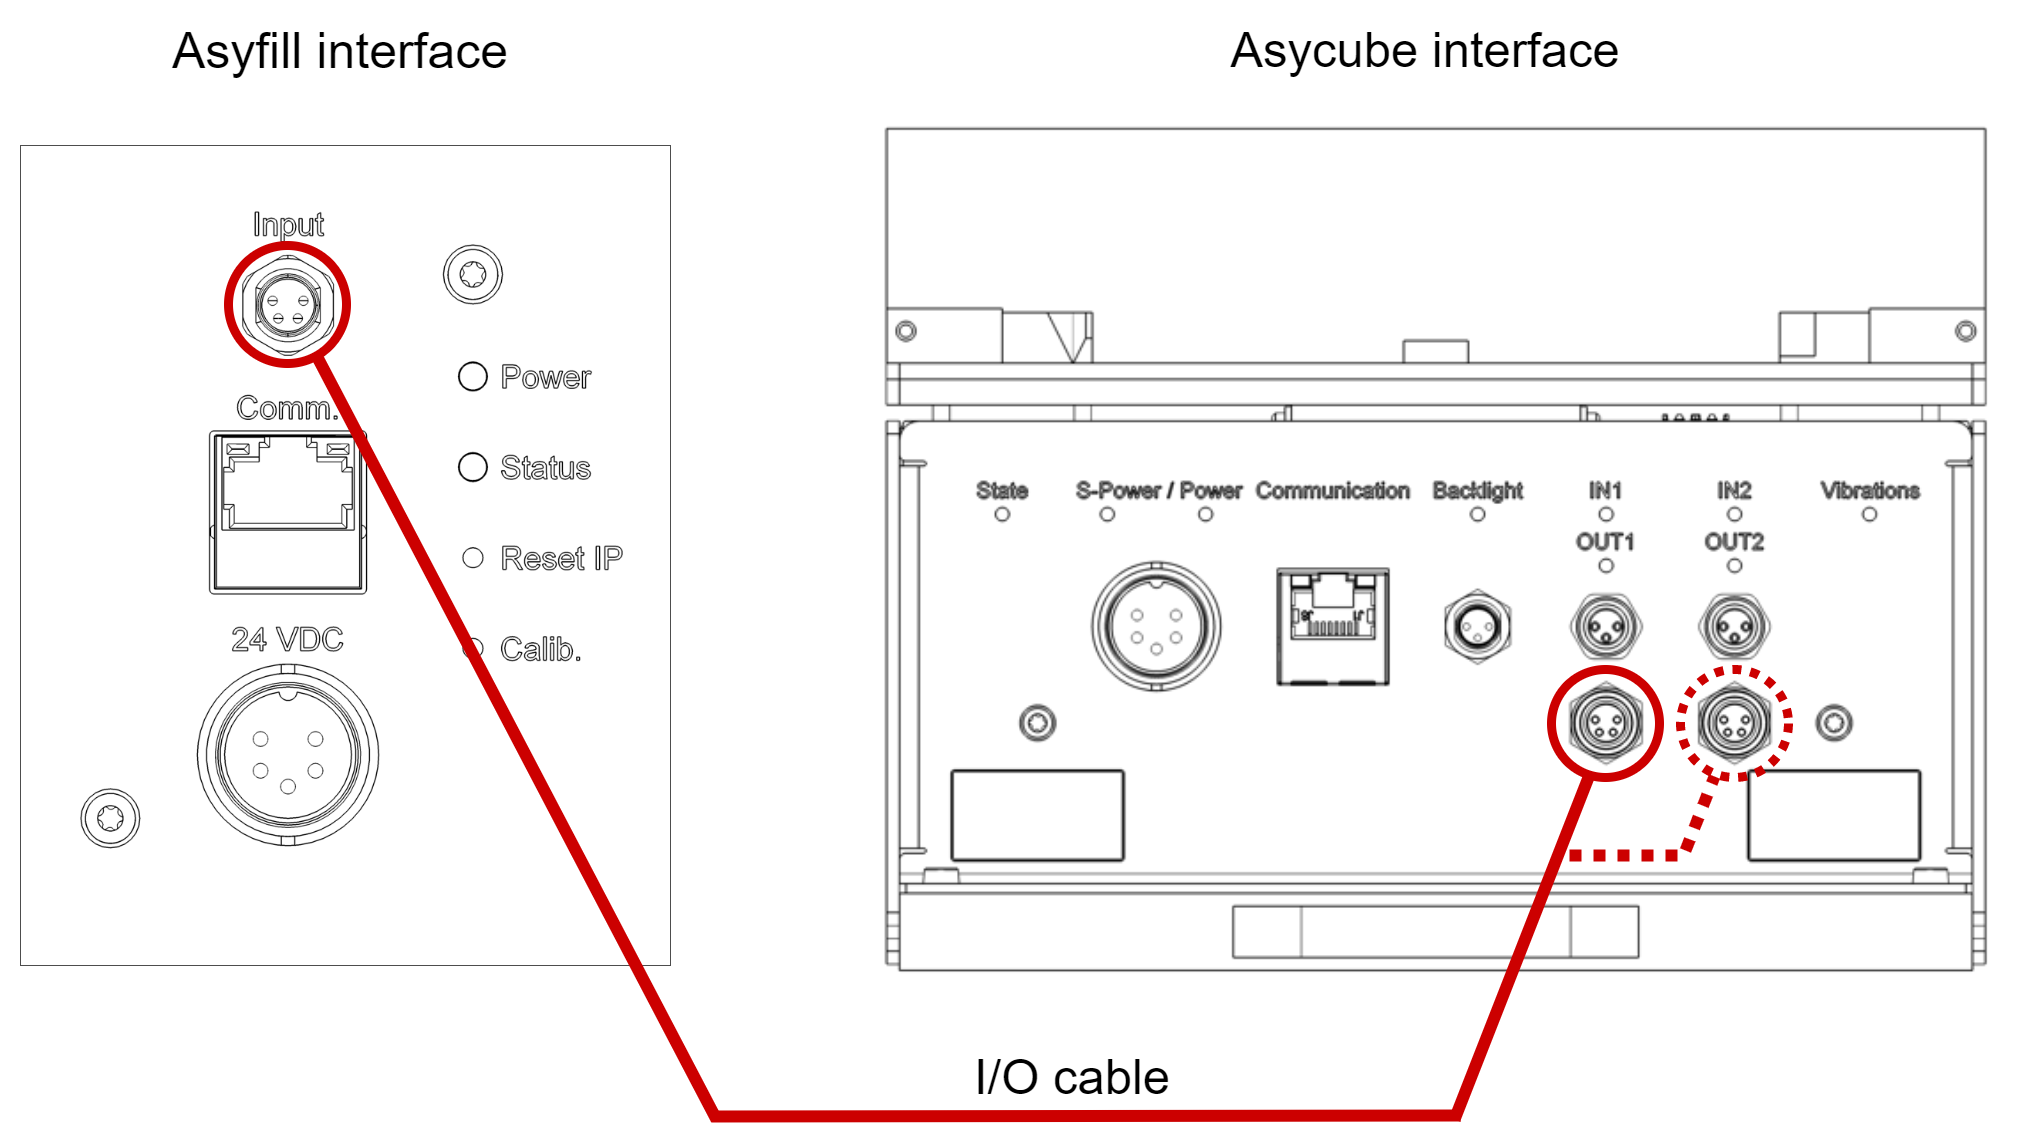
図 4 アジキューブに接続
アジフィルの校正
Perform a calibration by following the calibration procedure.
アジフィルの使用開始
The vibration amplitude of the Asyfill can now be tuned from Asycube Studio or EYE+ Studio. The execution of a vibration is triggered via the Asycube commands or directly by EYE+ depending on the system you are using. Refer to the appropriate user manual for more information.
注意
使用する部品や振動の大きさによっては、耳の保護をお勧めします。