Silos
The silos allows to extend the autonomy of the Asyfill. The silos are available in five different versions:
Silo for Asyfill S with comb for container 1L
Silo for Asyfill S with comb for container 2L
Silo for Asyfill M with comb for container 3L
Silo for Asyfill M with comb for container 7L
Silo for Asyfill L with comb for container 14L
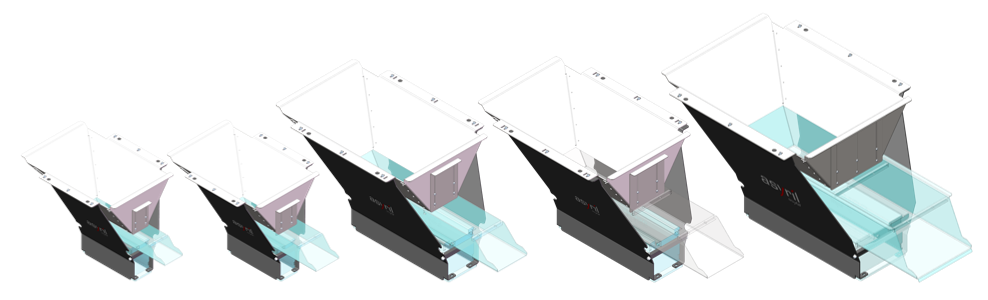
図 42 Overview of the Asyfill series with the silos installed
注釈
The silos are compatible with the fixation kits, with the exception of the modular fixation kit for Asyfill S in assembly variant 2.
注釈
For multi-feeding applications, it is not possible to integrate more than one Asyfill with Silo on one side of the Asycube. Please refer to the CAD files available in the Downloads section.
重要
The parts quantity must not exceed the Asyfill's maximal admissible load.
重要
Not all parts can be used with the Silo. Large or soft/sticky parts can cause clogging. Please contact our support team for any advice from our website.
寸法
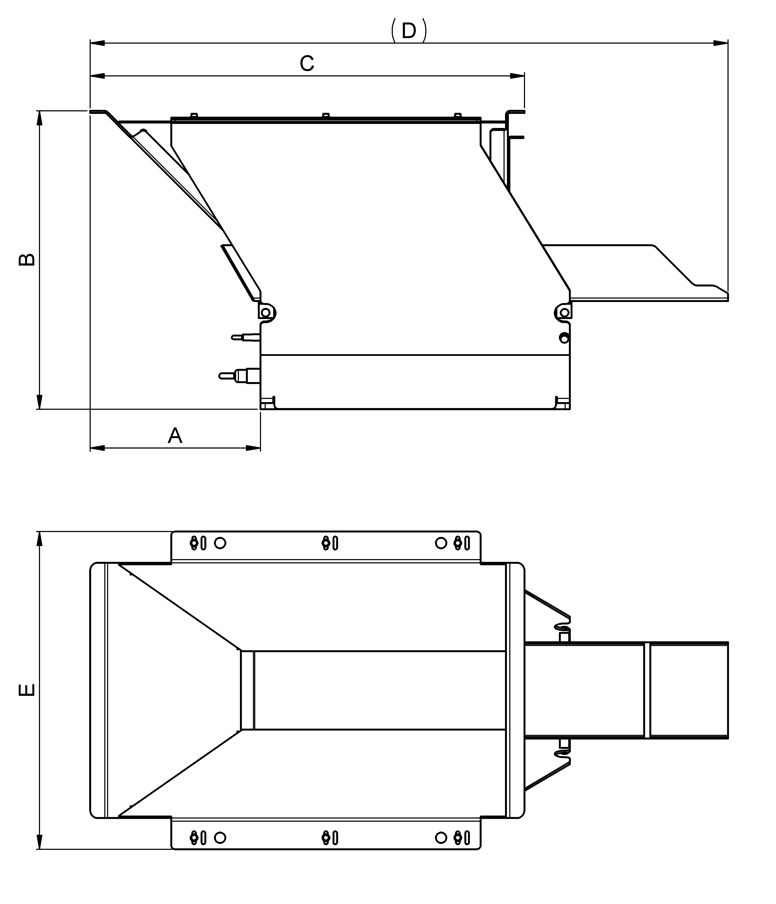
寸法(mm) |
Silo S 1L |
Silo S 2L |
Silo M 3L |
Silo M 7L |
Silo L 14L |
|---|---|---|---|---|---|
A |
200 |
200 |
220 |
232 |
230 |
B |
365 |
365 |
385 |
385 |
447 |
C |
461 |
461 |
561 |
561 |
611 |
D |
603 |
641 |
823 |
865 |
955 |
E |
375 |
375 |
410 |
410 |
520 |
Additional volume |
9 L |
9 L |
14 L |
14 L |
23 L |
Maximal admissible load 1 |
2 kg |
2 kg |
12 kg |
12 kg |
20 kg |
注釈
CAD files are available in the Downloads section.
Assembly
The silos are delivered pre-assembled with a fixation support which allows assembly on the same interface as the Asyfill. Please make sure that all the elements listed below are included in the package upon delivery:
1x pre-assembled silo with comb
2x mounting brackets
1x reinforcement bar
1x fixation screws kit
The assembly steps are described below:
Step 1 Assemble the two mounting brackets using the same fixing screws as the Asyfill, push each bracket against the housing before securing it.
Step 2 Install the front reinforcement bar, slightly push the reinforcement bar upwards before securing it.
Step 3 Install the pre-assembled silo on the brackets using the 6x M4 screws
Step 4 Adjust the comb depending on your application/parts
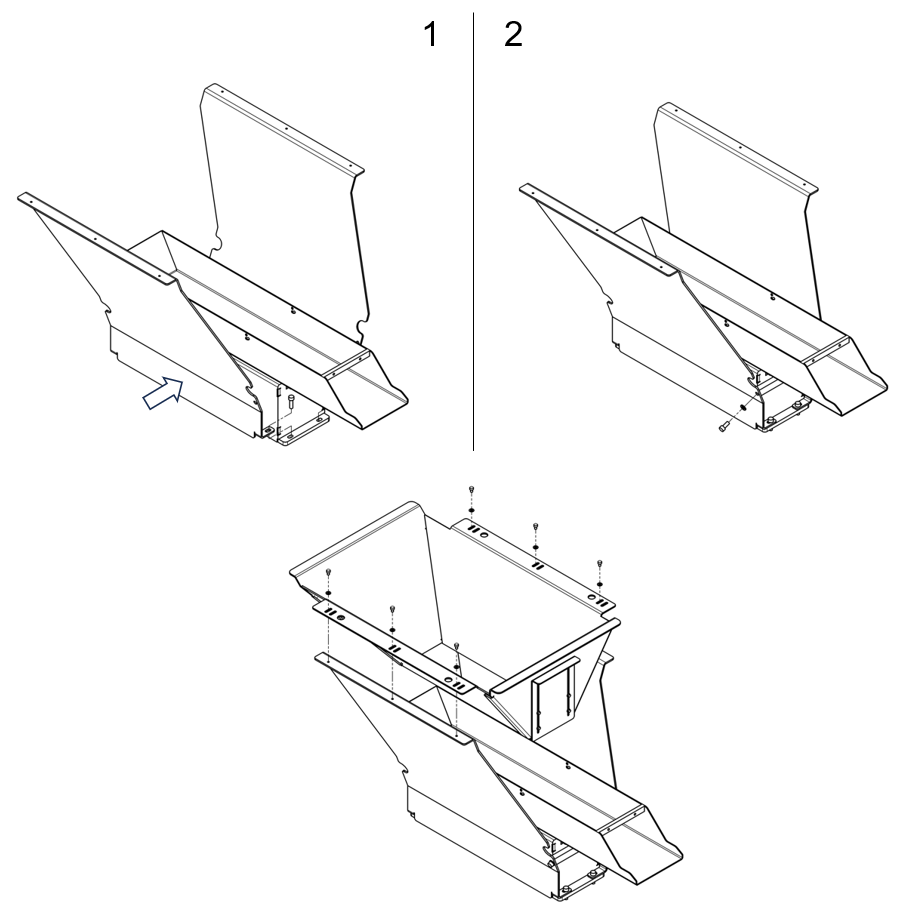
図 43 Silo assembly procedure