アジフィルの取り付け方法
To guarantee proper behavior of the Asyfill, a tight fastening to a solid base is necessary. Incorrect installation of the Asyfill could compromise performance. The four holes of the base plate can be used to fix the Asyfill mechanically with M6 screws. Refer to the section Overall dimensions to get the nominal dimensions of the fixation interface of the Asyfill.
ヒント
アジフィルの 3D モデル を参照してください。
アジキューブとアジフィルのペアリング の項を参照してください。
重要
Asyfill M/L のモジュラー固定キット を使用する場合、4本の M6 ネジを締める際のトルクは 4 Nm を超えないようにしてください。
アジキューブと一体化の方法
統合の例は、 図 8 に示されており、アジフィルはアジキューブと同じ強力なサポートに固定されています。アジキューブの統合は、 アジキューブの機械的インテグレーション に記載されているガイドラインを必ずご覧ください。
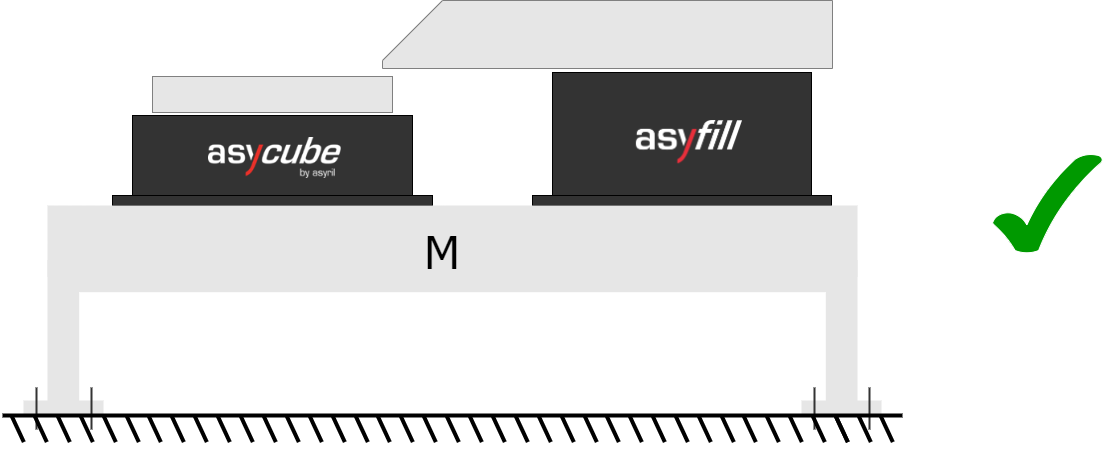
図 8 アジフィルとアジキューブの一体化
一体化における注意点
良い統合例 図 8 と悪い統合例 図 11 を参照してください。一般的には、アジフィルをマシンフレームに直接取り付けることをお勧めしています。
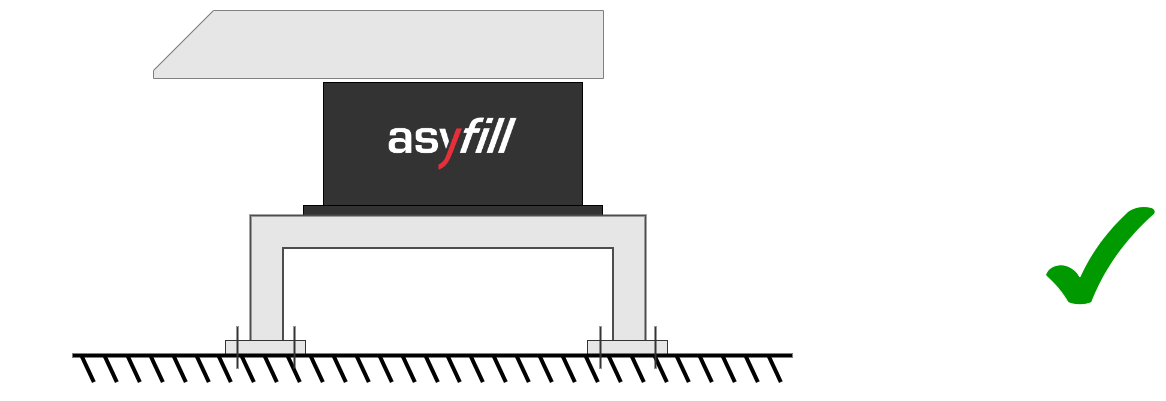
図 9 アジフィルの正しい統合方法
重要
Never attach Asyfill directly to vibration isolators, Asyfill already integrates vibration isolators in its housing. Using external vibration isolators would cause the inside of the Asyfill to vibrate more than the container itself and could irreversibly damage the electronic controller.
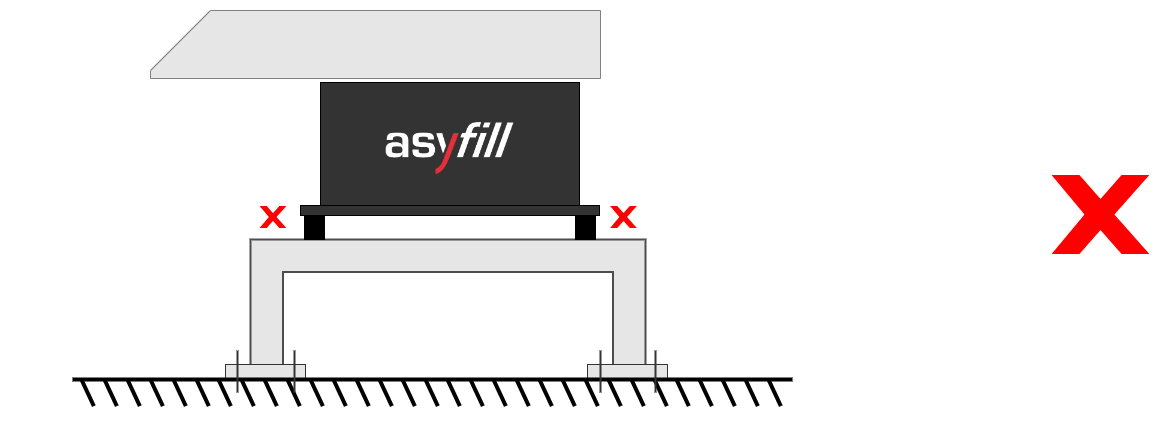
図 10 アジフィルを振動遮断装置に取り付けないでください。
重要
アジフィルを弱いサポートやテーブルの上に決して取り付けないでください。
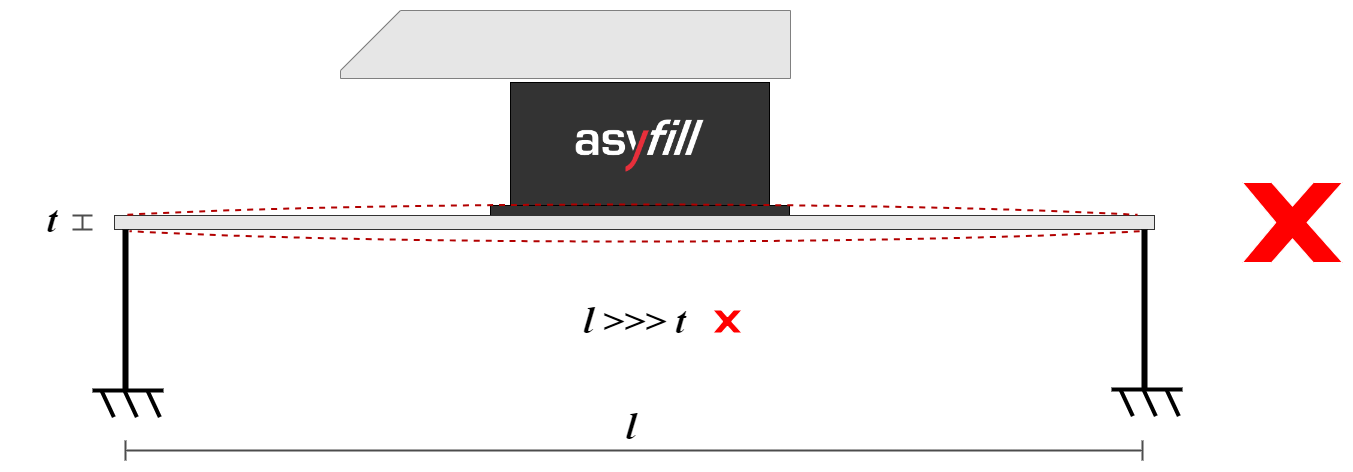
図 11 アジフィルを弱いテーブルの上に取り付けないでください。