First startup
This chapter guides you from unpacking your elements to the start of your Asyfill.
Assembly of the Asyfill
Unpack the Asyfill actuator base and the container delivered in two packages as described in unpacking instructions
Fix the container on the actuator base with the 4 screws and washers included as described in assembling the container
Caution
Risk of pinching. Do not place your finger between the container and its actuator base. Do not touch the machine during a vibration.
Mounting and wiring of the Asyfill
Use the holes in the base plate to fix the Asyfill to a solid base with four M6 screws, refer to mounting the Asyfill for detailed information.
Connect the Asyfill to a 24 VDC power supply via the optional power cable.
Important
Check the correct polarity of your 24 VDC power plug before connection.
Note
Refer to section Electrical Interfaces to get more information.
Wiring for interacting with Asyfill
There are two ways to interact with your Asyfill. If you have a complete setup with an EYE+ Controller, we recommend connecting your Asyfill to EYE+ using the Ethernet port on the back. Please refer to EYE+ documentation for more information.
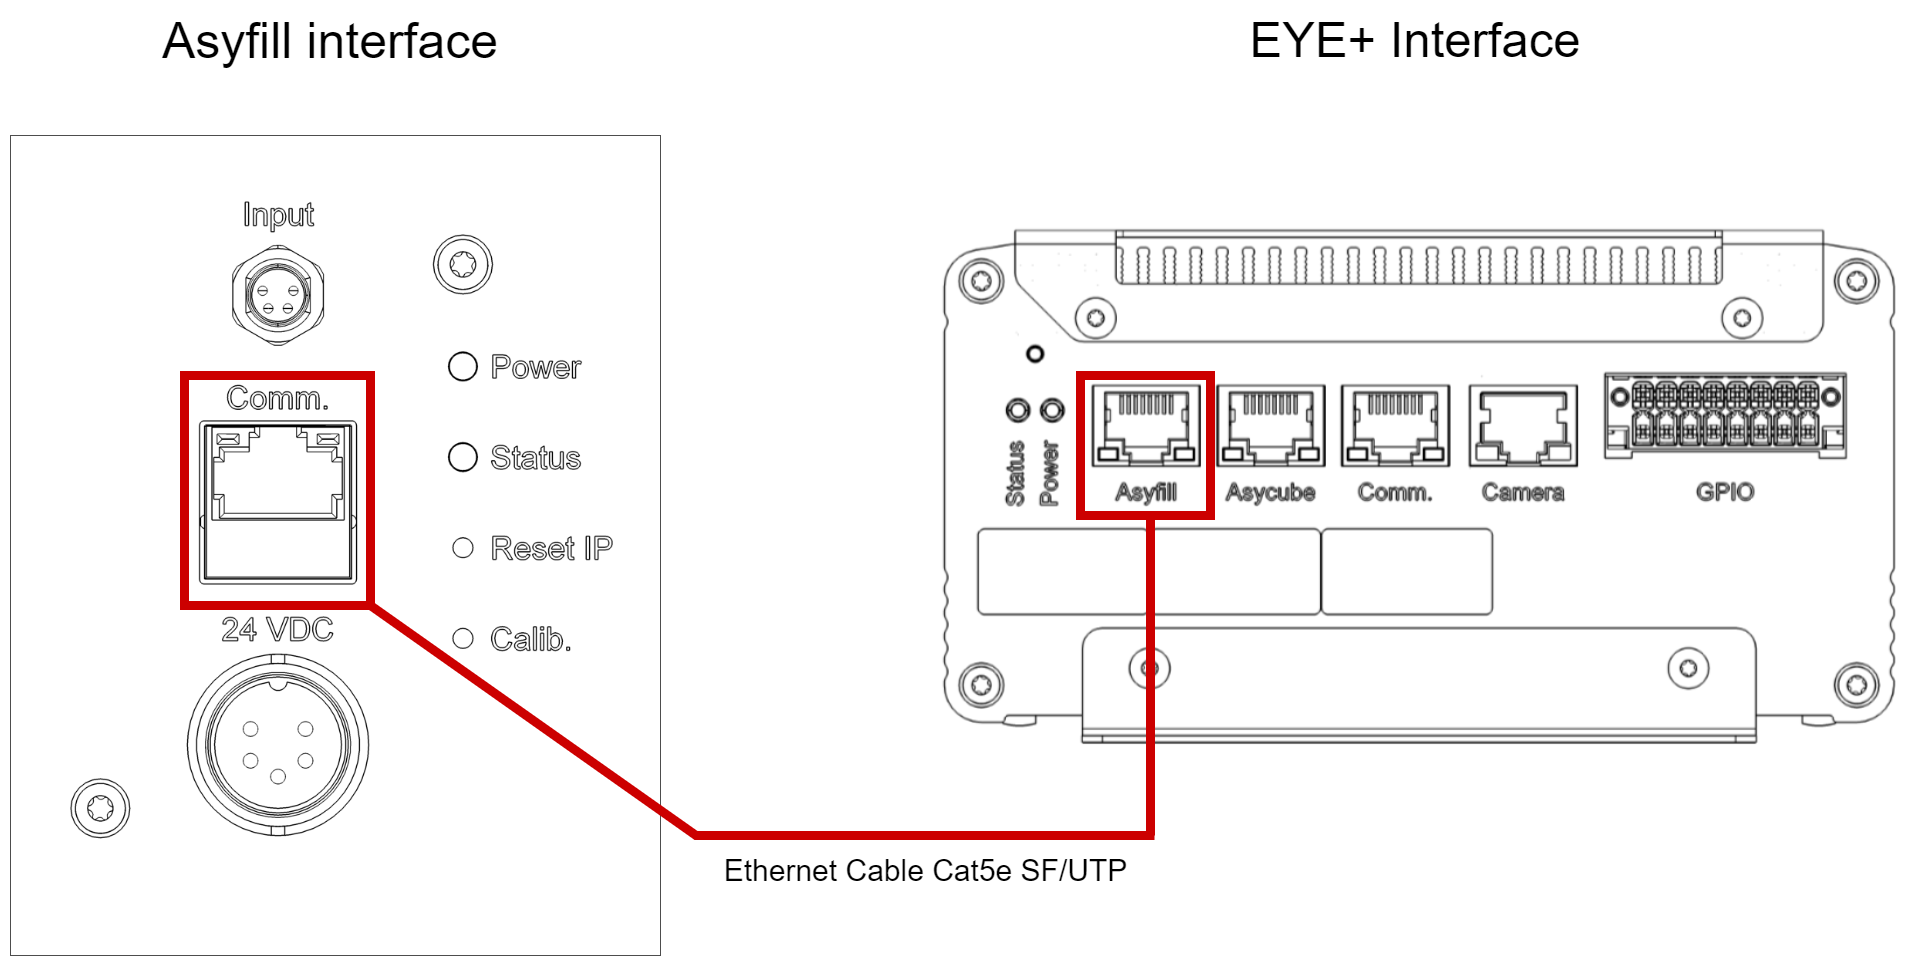
Fig. 3 Connection with EYE+
If you do not have EYE+, you can connect your Asyfill Input interface to one of the Asycube OUT port using a I/O cable.
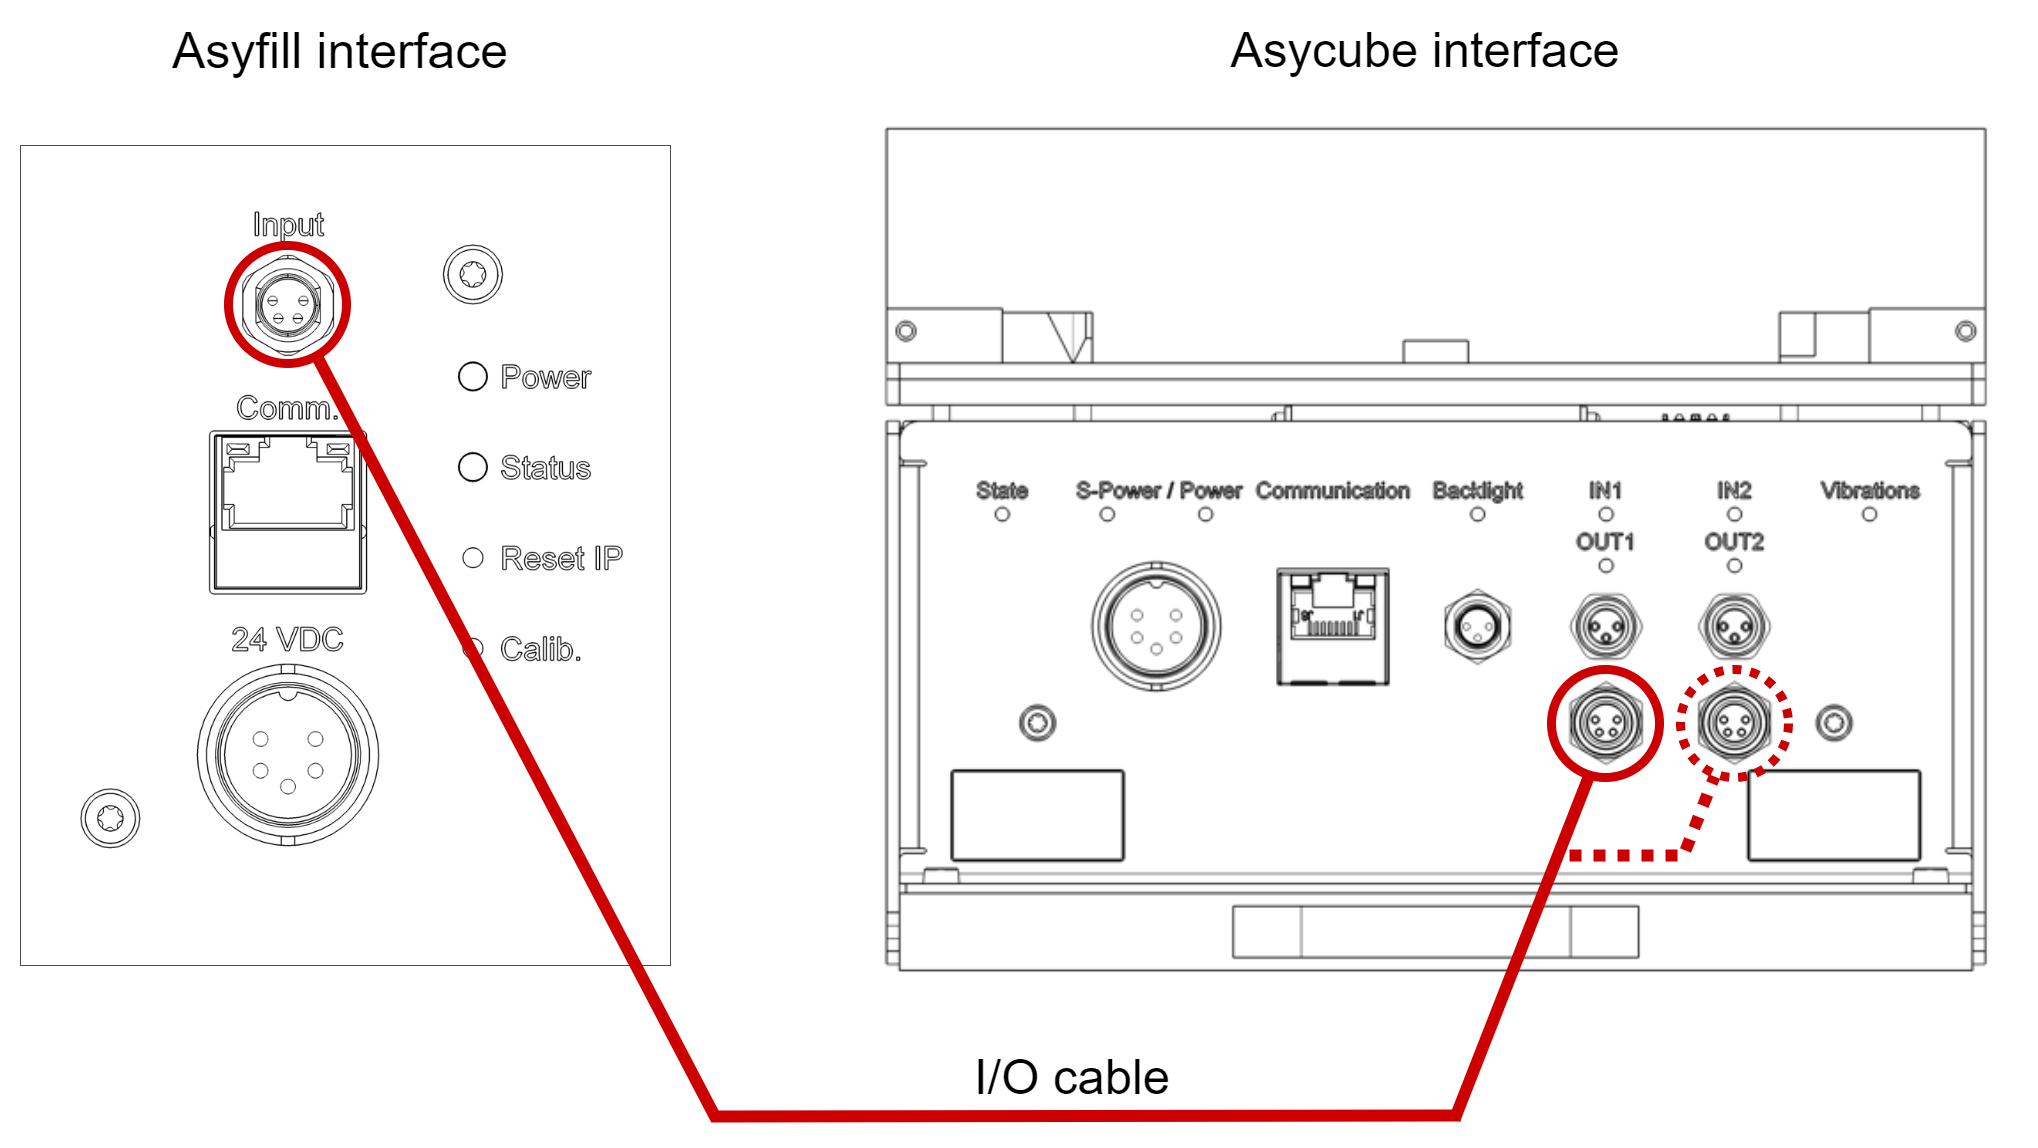
Fig. 4 Connection with Asycube
Calibration of the Asyfill
Perform a calibration by following the calibration procedure.
Start using your Asyfill
The vibration amplitude of the Asyfill can now be tuned from Asycube Studio or EYE+ Studio. The execution of a vibration is triggered via the Asycube commands or directly by EYE+ depending on the system you are using. Refer to the appropriate user manual for more information.
Caution
Ear protection might be recommended, depending on the parts and vibration amplitude used in your application.