Slides
The slides are available for all container sizes and are useful for a variety of applications:
to prevent part from being in the field of view of the EYE+ camera
to prevent part from falling unintentionally into the Asycube outside the vibration sequence
The slides are supplied with a double-use slide platform. One side of the platform has an anti-roll surface (pyramid plate) and the other side is flat.
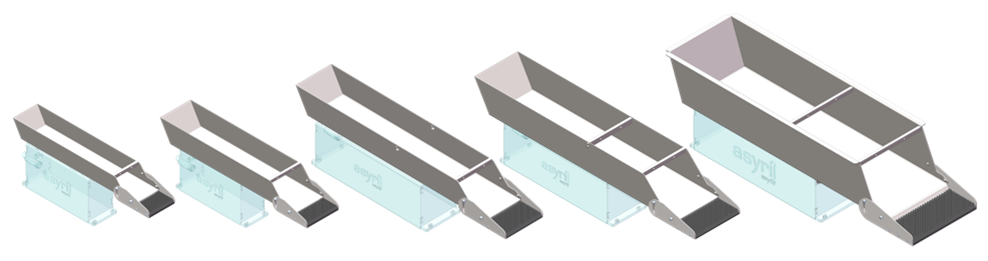
Fig. 36 Asyfill with the slide mounted on the container
Flat side
Using the slide platform on the flat side is generally recommended when parts can interfere with the EYE+ field of view. This can be the case for relatively long parts. In this case the slide can be tilted at an angle of up to 30°.
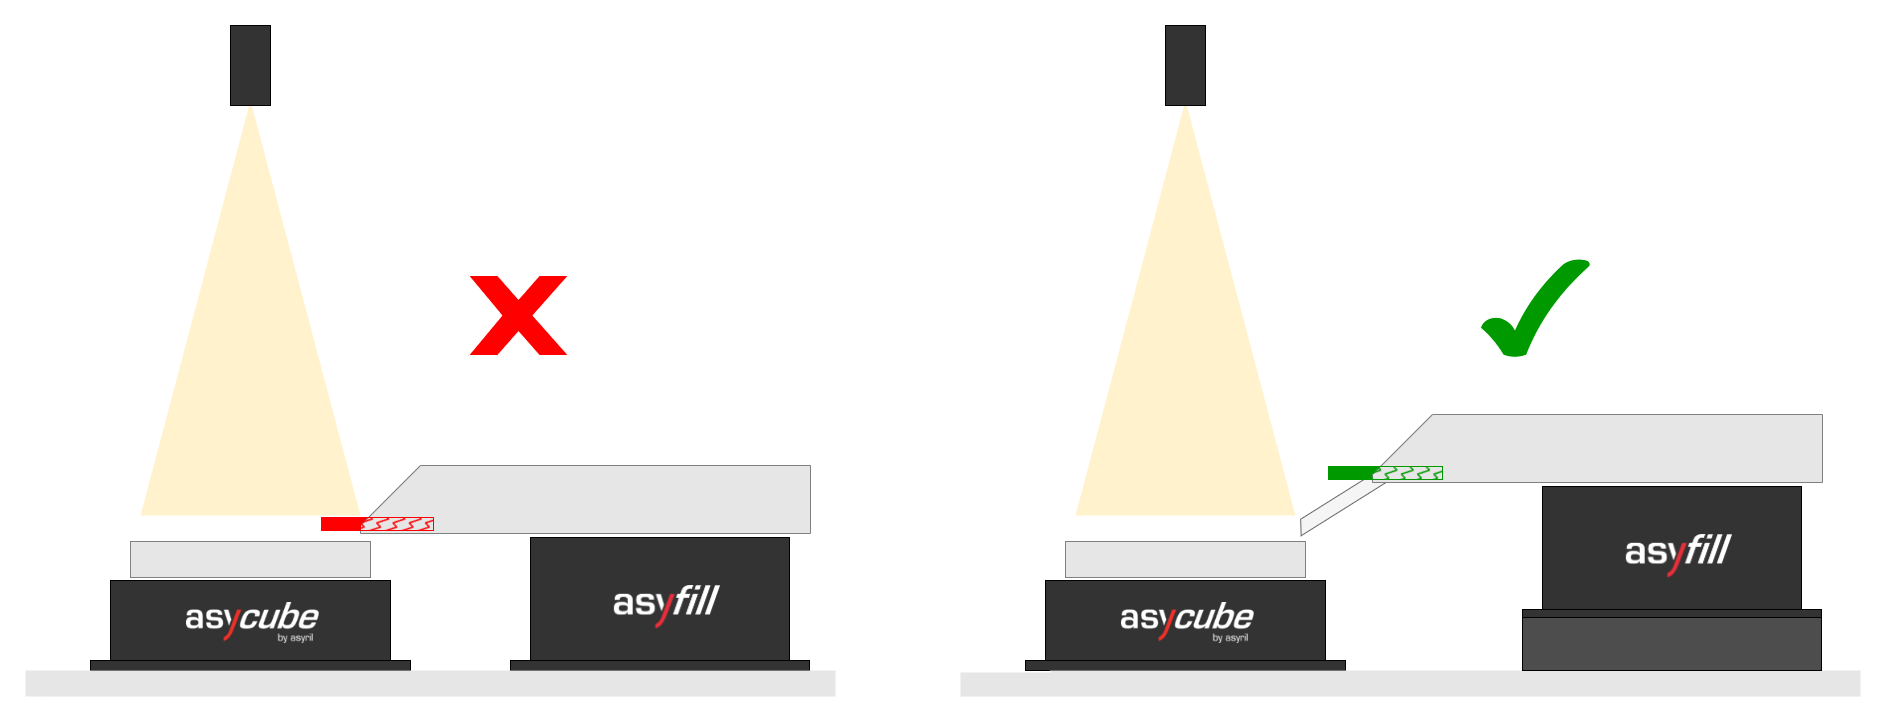
Fig. 37 Illustration of use case with long parts
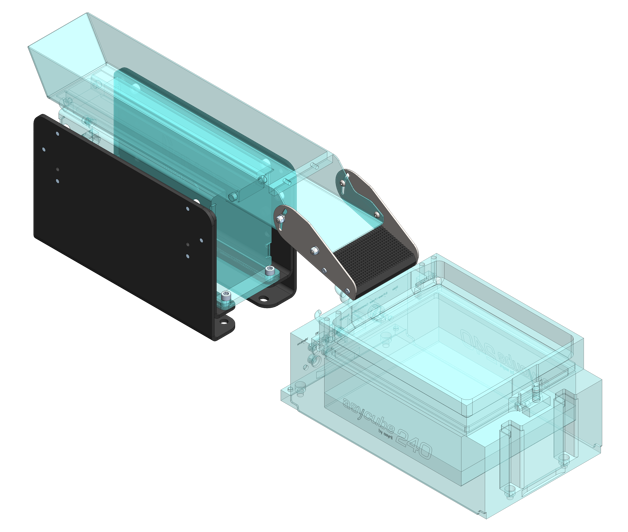
Fig. 38 Asyfill S with a slide at 15° on flat side. To fit the Asycube 240 the Modular fixation kit is required
Anti-roll side
Using the slide platform on the anti-roll side prevent parts from falling unintentionally into the Asycube outside the vibration sequence. In this case the slide is generally mounted horizontally.
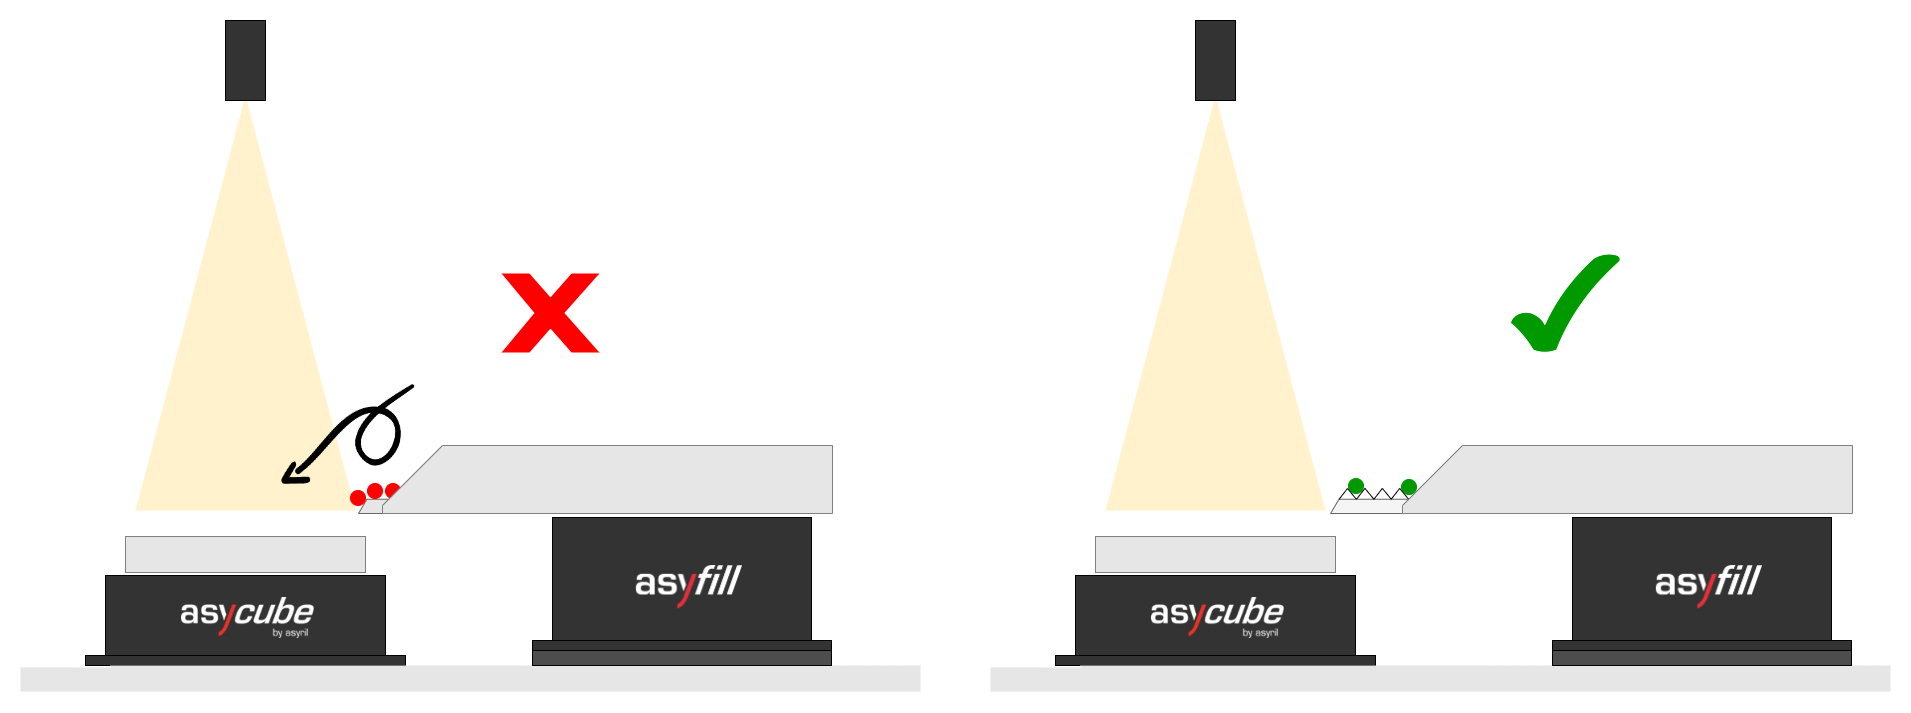
Fig. 39 Illustration of use case with cylindrical parts
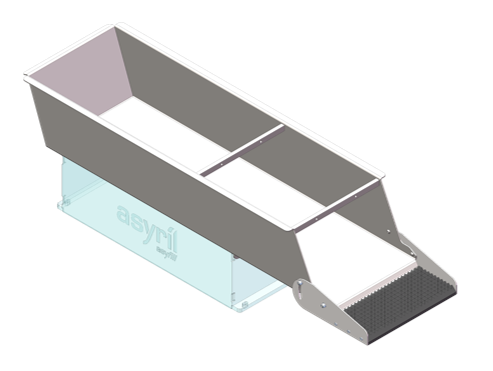
Fig. 40 Example of Asyfill L with the anti-roll platform mounted at 0°
Slide types
Slide type
Available for container
Suitable for parts
V25
1 / 2 / 3 / 7 L
ø 1.7mm – ø 3.5mm
V50
1 / 2 / 3 / 7 / 14 L
ø 3.5mm – ø 7mm
V80
14 L
> ø 7mm
Flat 1
All containers
All parts
Note
CAD files are available in the Downloads section.
Assembly
The slide is supplied as a kit, leaving the user free to choose the orientation of the platform. Please make sure that all the elements listed below are included in the package:
1x double-use slide platform
2x side brackets
1x fixation screws kit
Note
When Asyfill is purchased together with a slide, an Asyfill accessory container is necessary to carry the slide.
Note
When a slide is installed on the container, it is required to raise the Asyfill. The fixation kits can be used for this purpose.
Important
If you wish to equip your existing container with a slide, you will need to drill the container yourself. In this case, remove the container first and refer to the CAD files available in the Downloads section.
The assembly steps are described below:
Step 1 Choose the platform orientation
Step 2 Fix the two brackets on each side of the platform with the supplied M3 screws
Step 3 Install the slide on the container with the supplied M4 screws/washers/nuts, adjust the position and secure it.
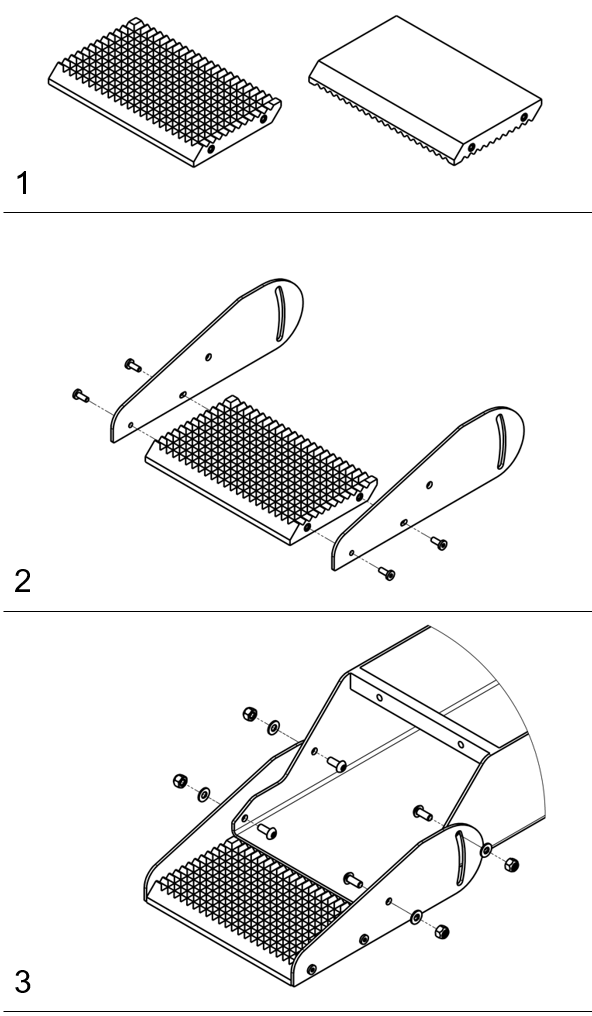
Fig. 41 Slide assembly procedure