Overlap between Asyfill and Asycube
The recommended overlap between the Asyfill and the Asycube is given in the Table 7.
Asycube 240 |
Asycube 380 |
Asycube 530 |
|
|---|---|---|---|
Asyfill S |
5 mm Fig. 22 |
5 mm Fig. 23 |
5 mm Fig. 23 |
Asyfill M |
5 mm Fig. 22 |
5 mm Fig. 23 |
5 mm Fig. 23 |
Asyfill L |
N/A |
5 mm Fig. 24 |
5 mm Fig. 24 |
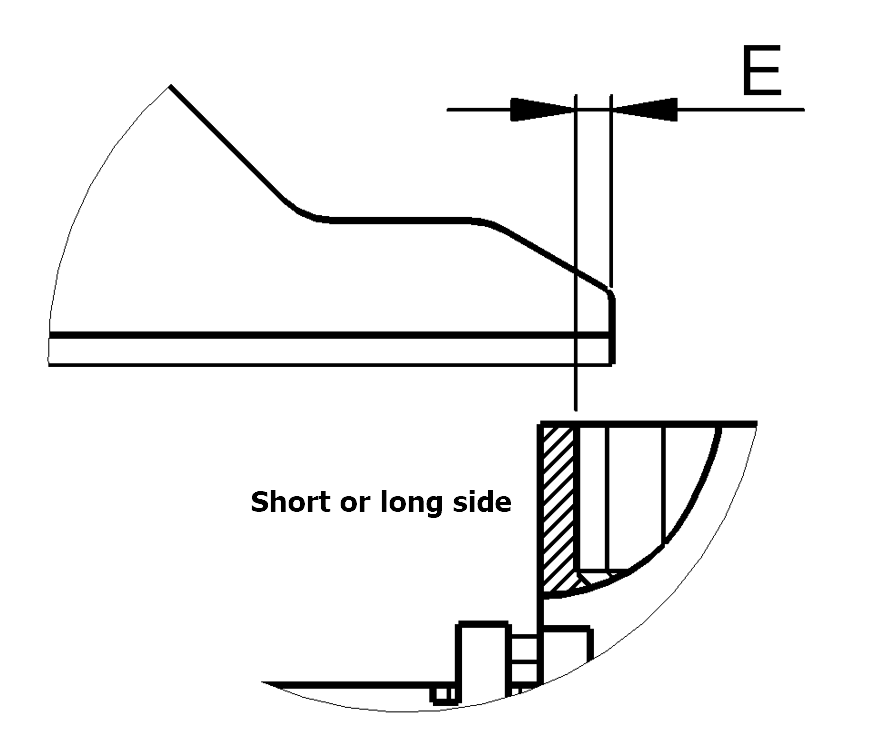
Fig. 22 Overlap between Asyfill S or M and Asycube 240
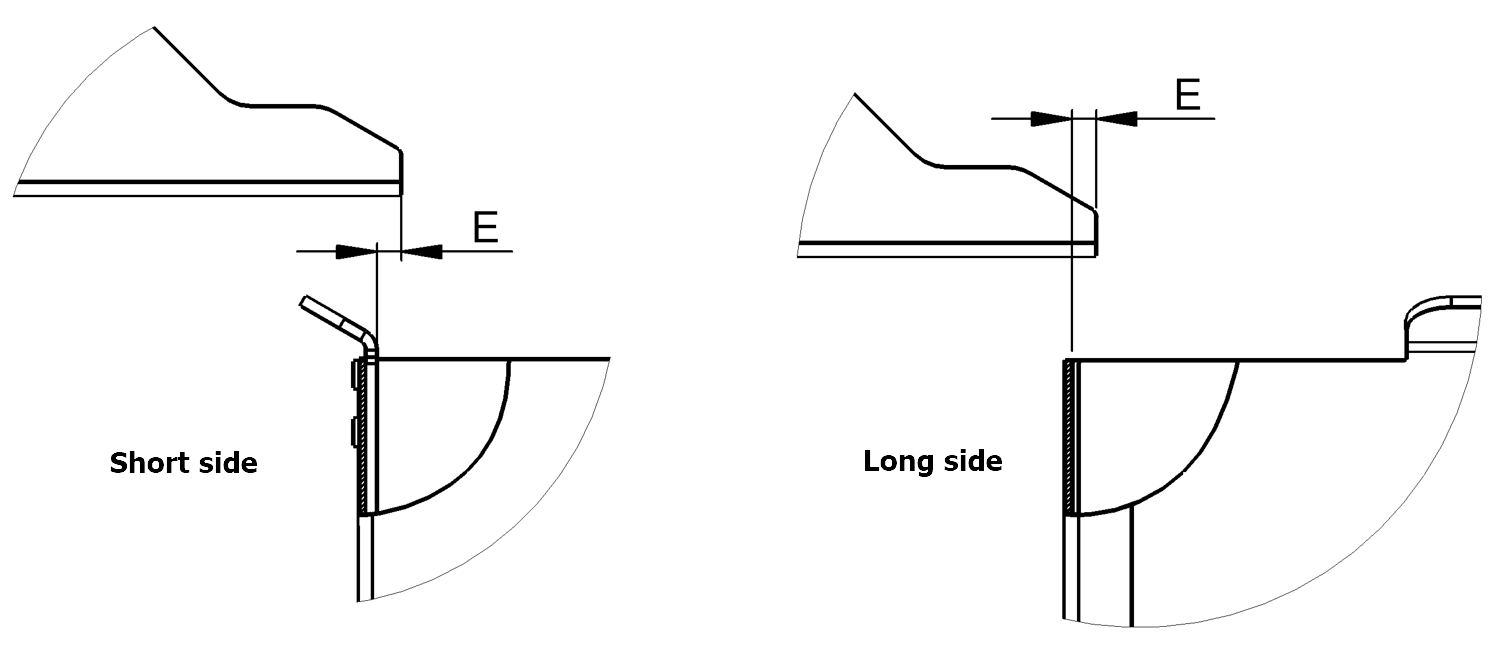
Fig. 23 Overlap between Asyfill S or M and Asycube 380 or 530
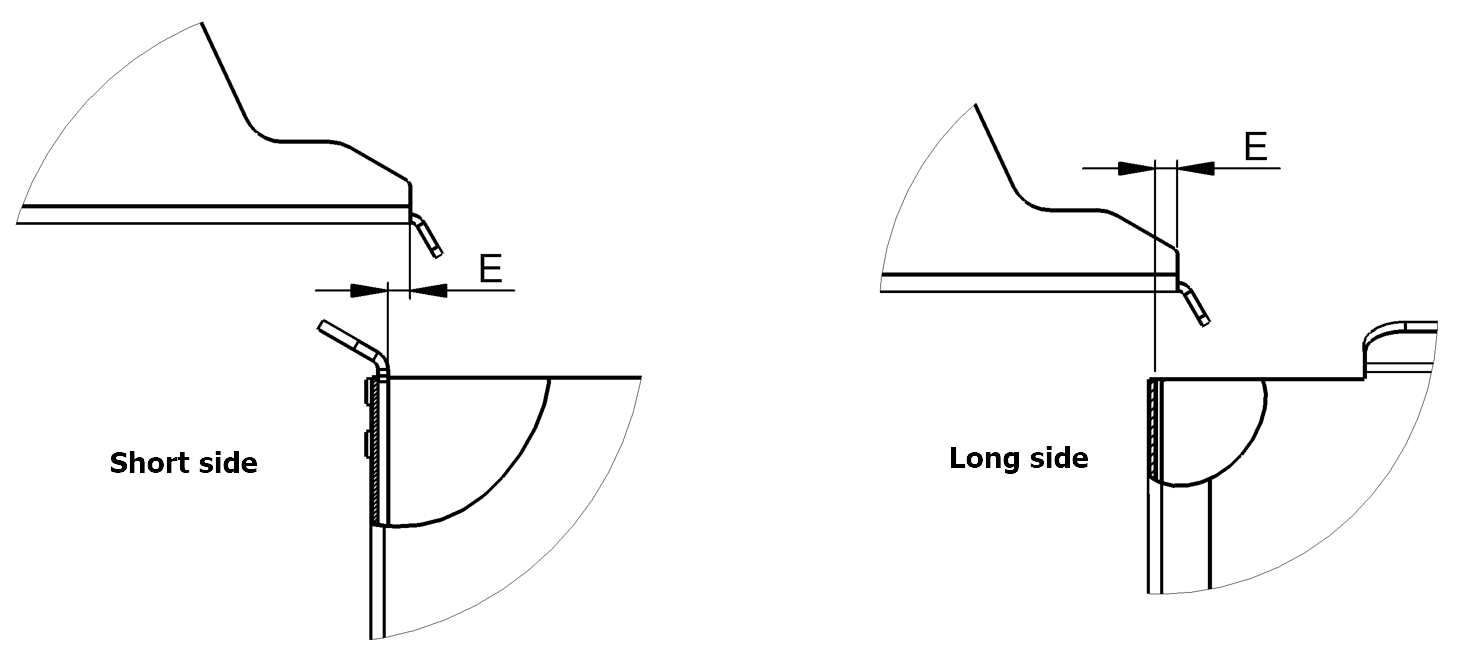
Fig. 24 Overlap between Asyfill L and Asycube 380 or 530
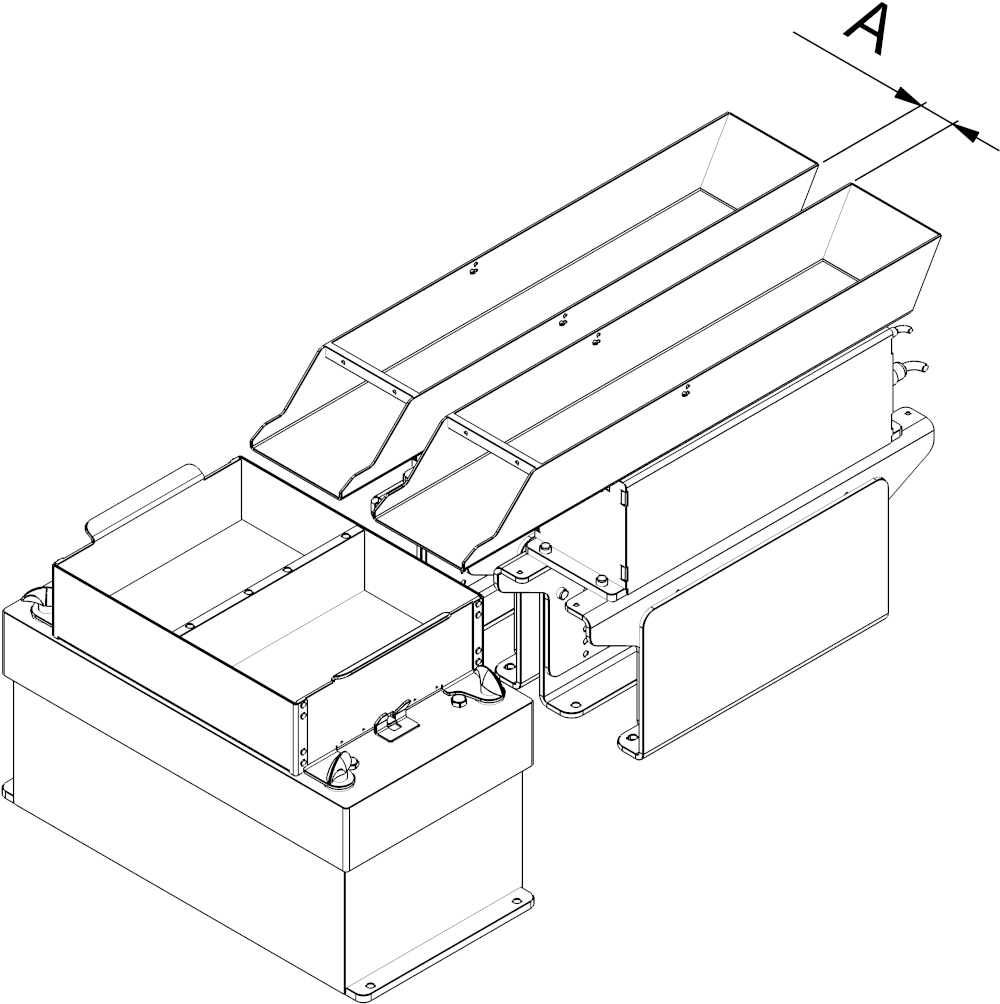
Distance between two Asyfill
In multi-feeding applications, the recommended distance between two Asyfill when placed side by side on the long side of the Asycube is given in the table below.
Asycube 240 |
Asycube 380 |
Asycube 530 |
|
|---|---|---|---|
Asyfill S 1L |
17 mm |
N/A |
N/A |
Asyfill S 2L |
N/A |
N/A |
N/A |
Asyfill M 3L |
N/A |
43 mm |
95 mm |
Asyfill M 7L |
N/A |
N/A |
66 mm |
Asyfill L 14L |
N/A |
N/A |
N/A |