Mounting the Asyfill
To guarantee a proper behavior of the Asyfill, a tight fastening to a solid underground is necessary. An incorrect installation of the Asyfill could compromise the performances of the product. The four holes of the base plate can be used to fix the Asyfill mechanically with M6 screws. Refer to the section Overall dimensions to get the nominal dimensions of the fixation interface of the Asyfill.
Tip
Refer to the 3D models of the Asyfill.
Refer to the section Pairing Asyfill with Asycube.
Important
When using the Modular fixation kit for Asyfill M and L do not exceed a torque of 4 Nm when tightening the 4x M6 screws.
Integration with Asycube
Integration example is shown in Fig. 7 where the Asyfill is fixed on the same strong support as the Asycube. The integration of the Asycube must respect the guidelines described in Asycube Mechanical Integration.
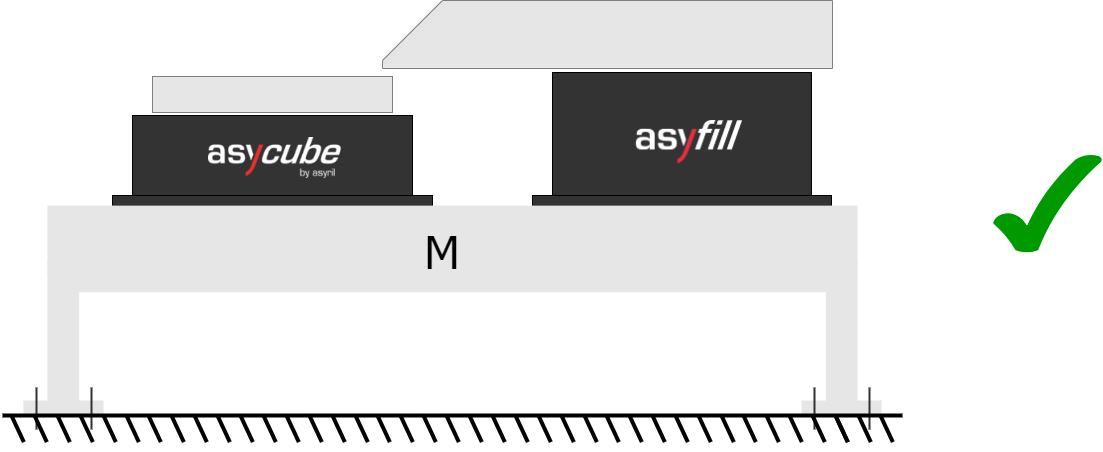
Fig. 7 Integration of Asyfill and Asycube
Integration dos/don’ts
Good and bad integration examples are given in Fig. 8 to Fig. 10. In general, we recommend mounting the Asyfill directly on the machine frame.
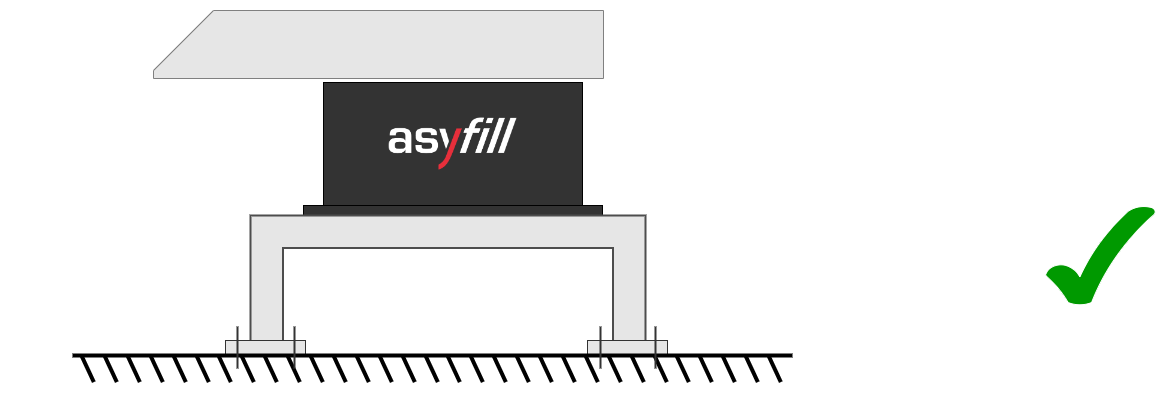
Fig. 8 Correct integration of Asyfill
Important
Never attach Asyfill directly to vibration isolators, Asyfill already integrates vibration isolators in its housing. Using external vibration isolator would cause the inside of the Asyfill to vibrate more than the container itself and could damage the electronic controller irremediably.
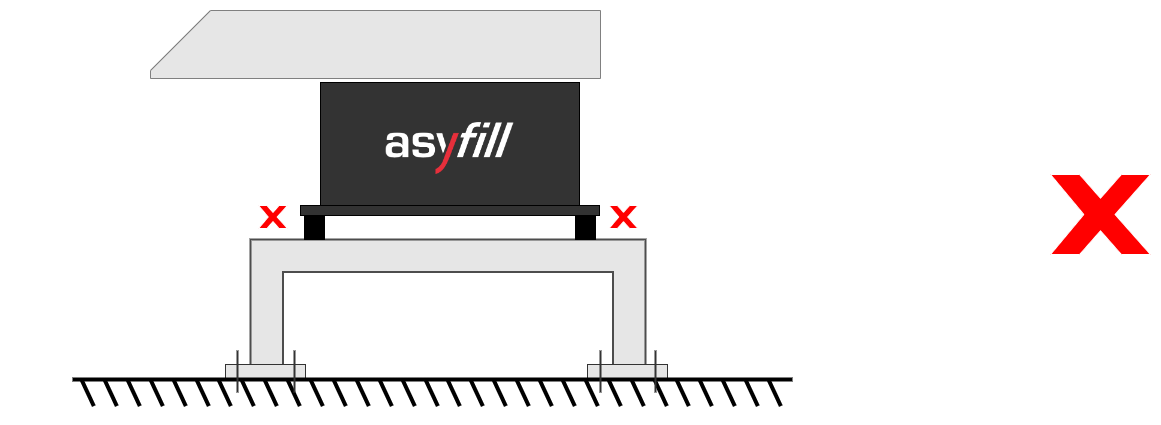
Fig. 9 Do not mount an Asyfill on vibration isolators
Important
Never attach Asyfill on a weak support or table.
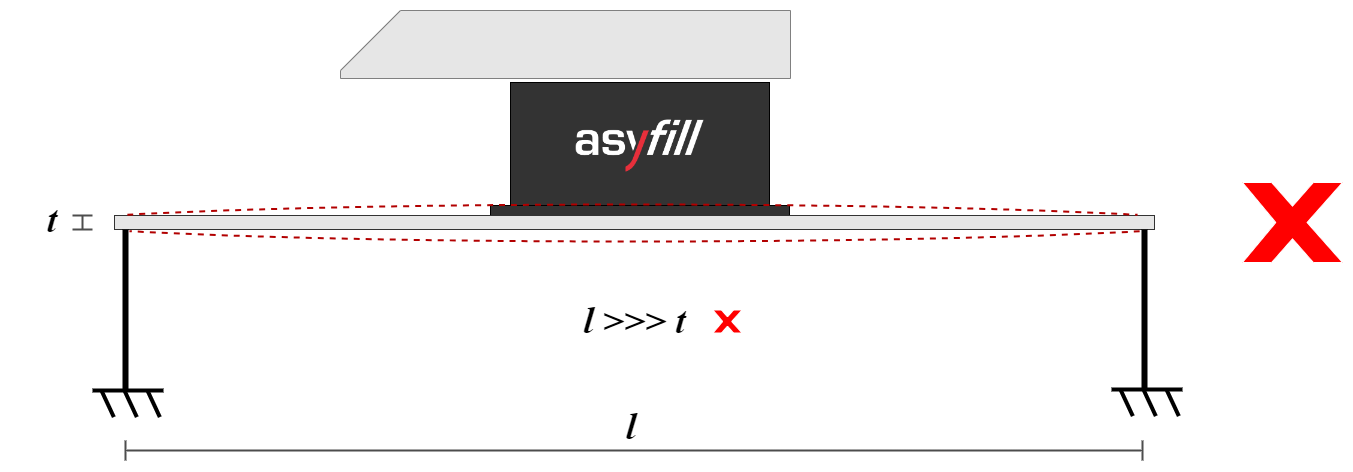
Fig. 10 Do not mount an Asyfill on a week table