Possible variants
The table below shows how many Asyfill can be used in conjunction with each Asycube size in either Short side or Long side:
Asycube 240 |
Asyfill S |
Asyfill M |
Asyfill L |
||
|---|---|---|---|---|---|
1L |
2L |
3L |
7L |
14L |
|
Short side |
1 |
1 |
1 |
0 |
0 |
Long side |
2 |
1 |
1 |
1 |
0 |
Asycube 380 |
Asyfill S |
Asyfill M |
Asyfill L |
||
|---|---|---|---|---|---|
1L |
2L |
3L |
7L |
14L |
|
Short side |
2 |
2 |
1 |
1 |
0 |
Long side |
2 |
2 |
2 |
1 |
1 |
Asycube 530 |
Asyfill S |
Asyfill M |
Asyfill L |
||
|---|---|---|---|---|---|
1L |
2L |
3L |
7L |
14L |
|
Short side |
2 |
2 |
2 |
2 |
1 |
Long side |
2 |
2 |
2 |
2 |
1 |
Fig. 12 Long side and Short side of the Asycube
Note
The information given in the above tables are based on one side of the Asycube, depending on the integration you may be able to mount Asyfill on both sides of the Asycube.
Note
When pairing Asyfill with Asycube 380 and Asycube 530, the optional modular fixation kits allows the Asyfill to be mounted at the ideal height.
Note
When two Asyfill can be mounted on the same long side of the Asycube, a multi-feeding application with up to 4 parts can also be considered by mounting 4 Asyfill symmetrically. If your application requires a configuration with more than two Asyfill, please contact our support team from our website.
The images below illustrate the different alternatives of pairing one or two Asyfill with an Asycube.
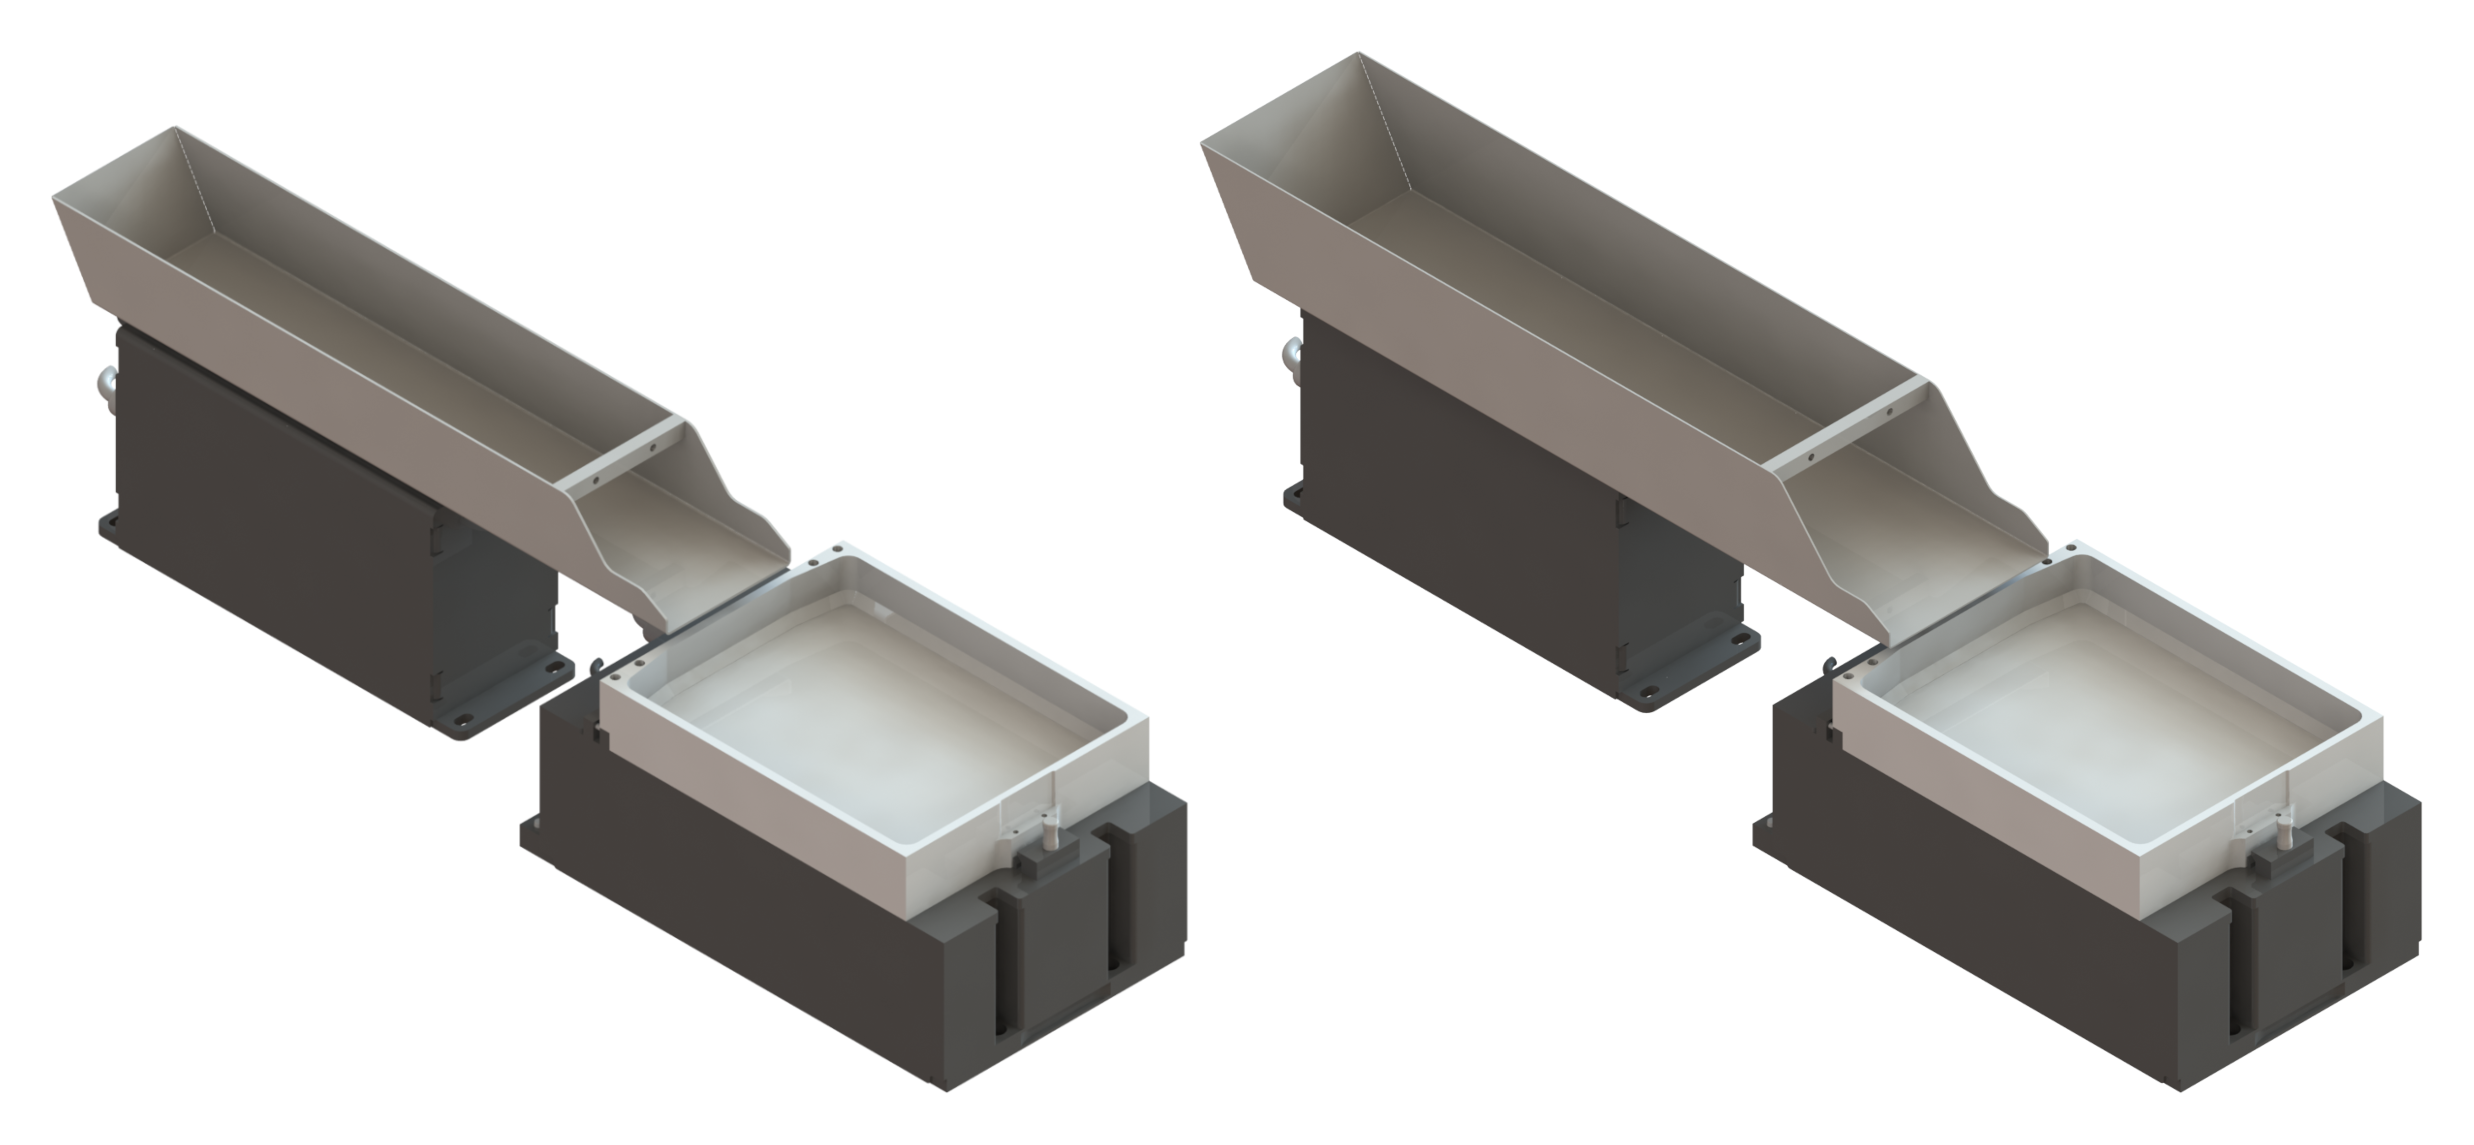
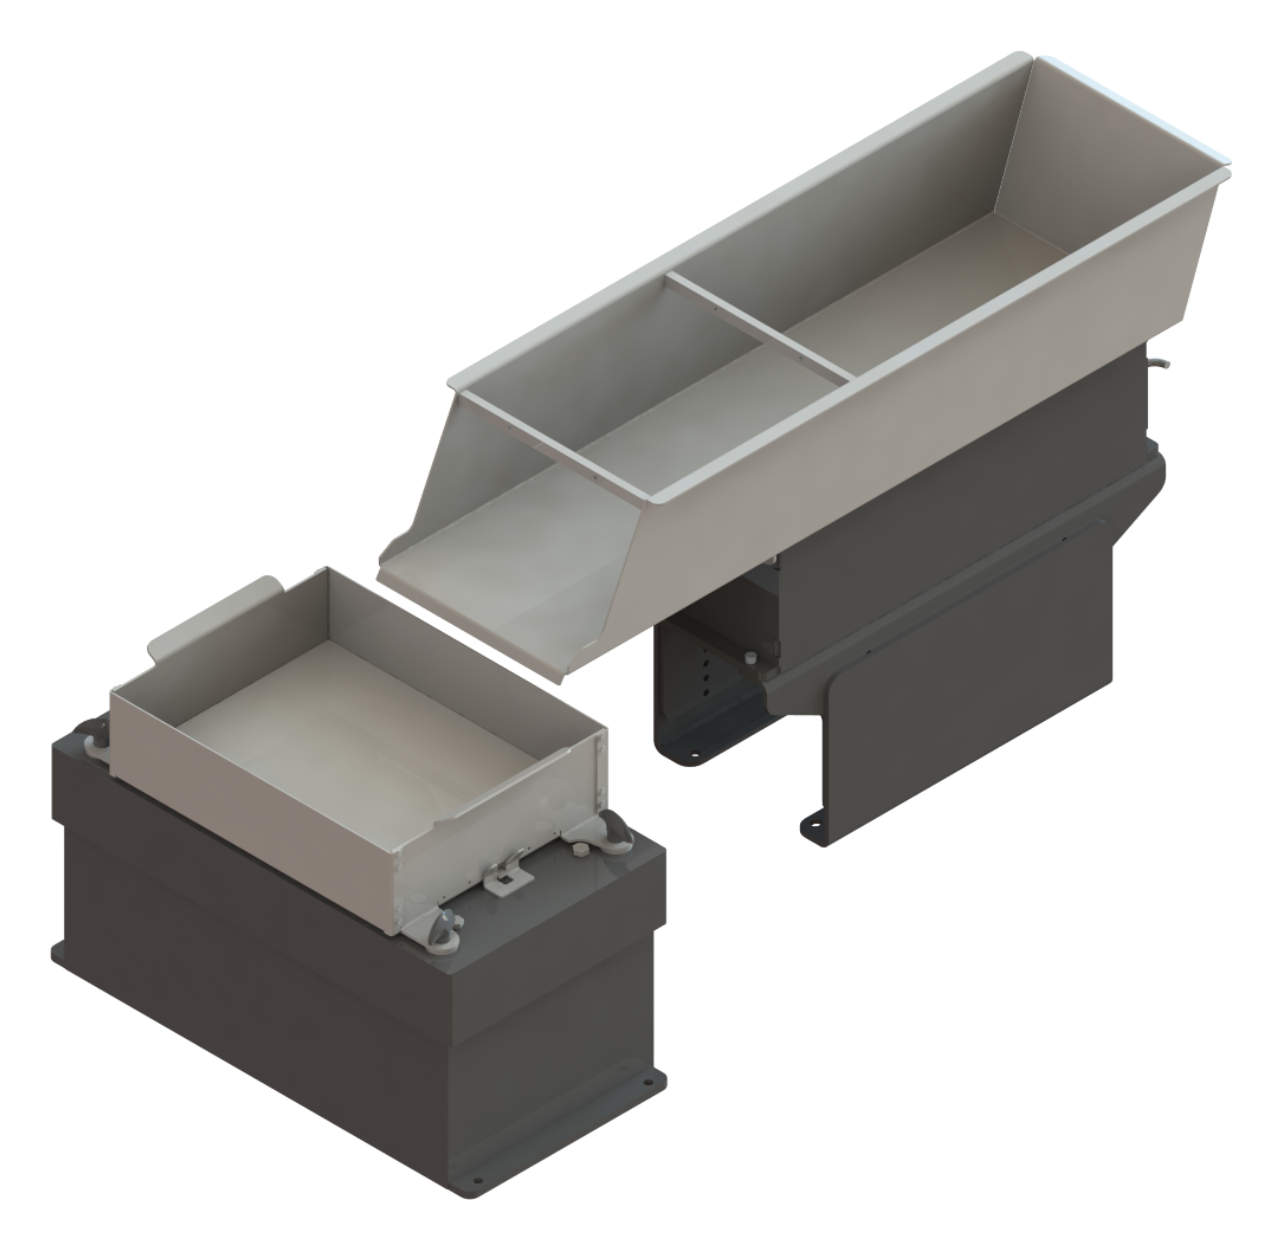
Fig. 13 Single part feeding: Asycube 240 with Asyfill S 1L (left) and Asyfill S 2L (right)
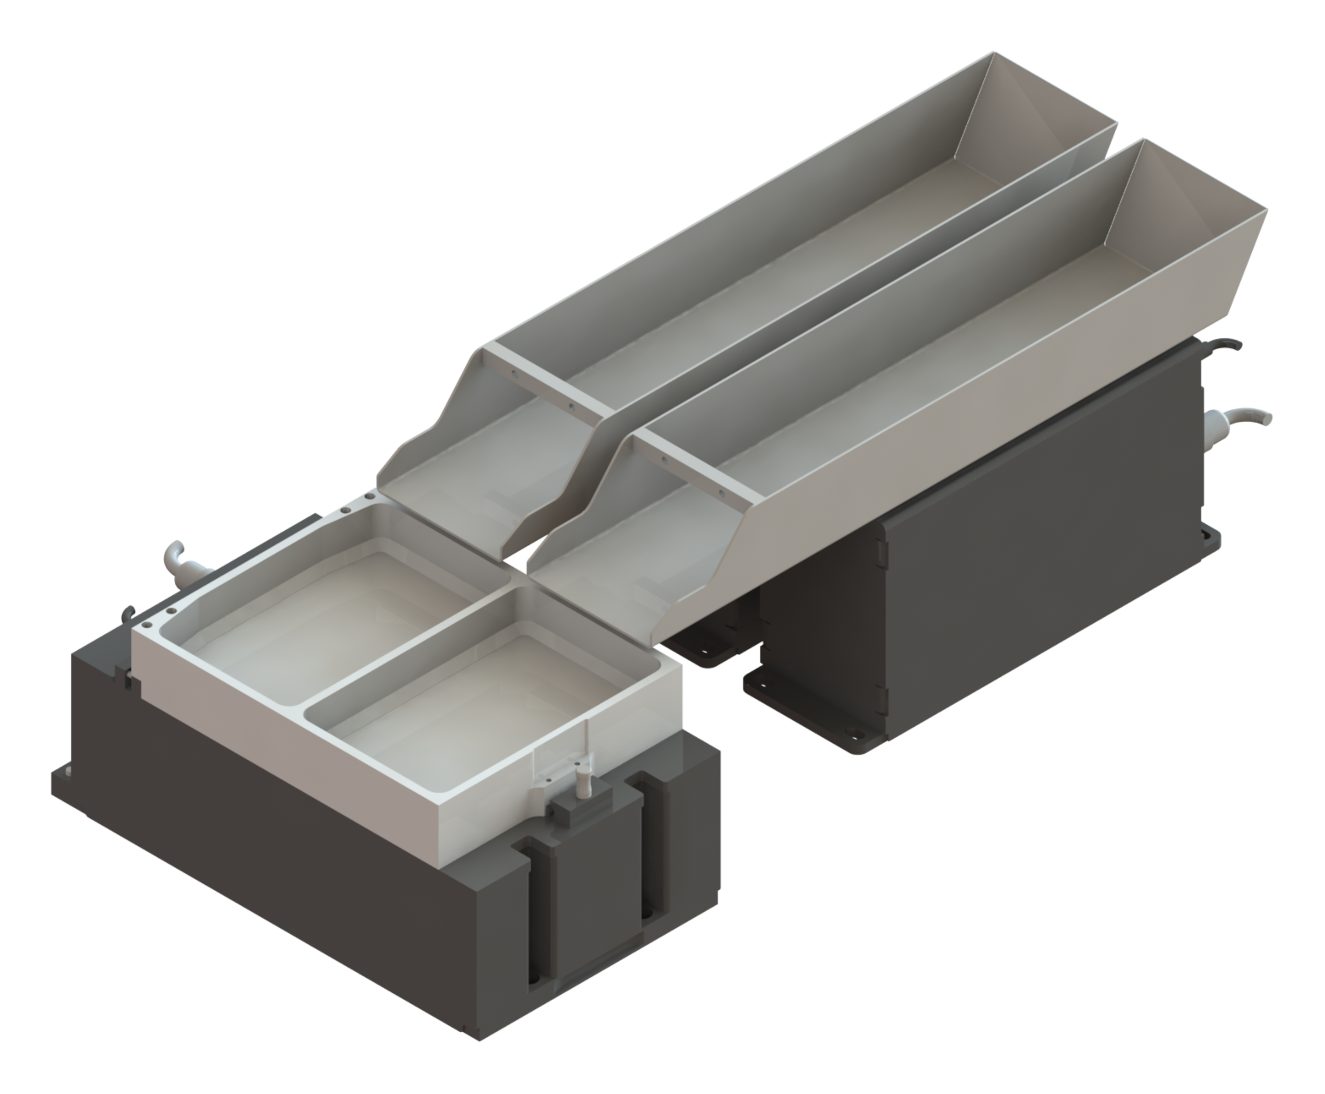
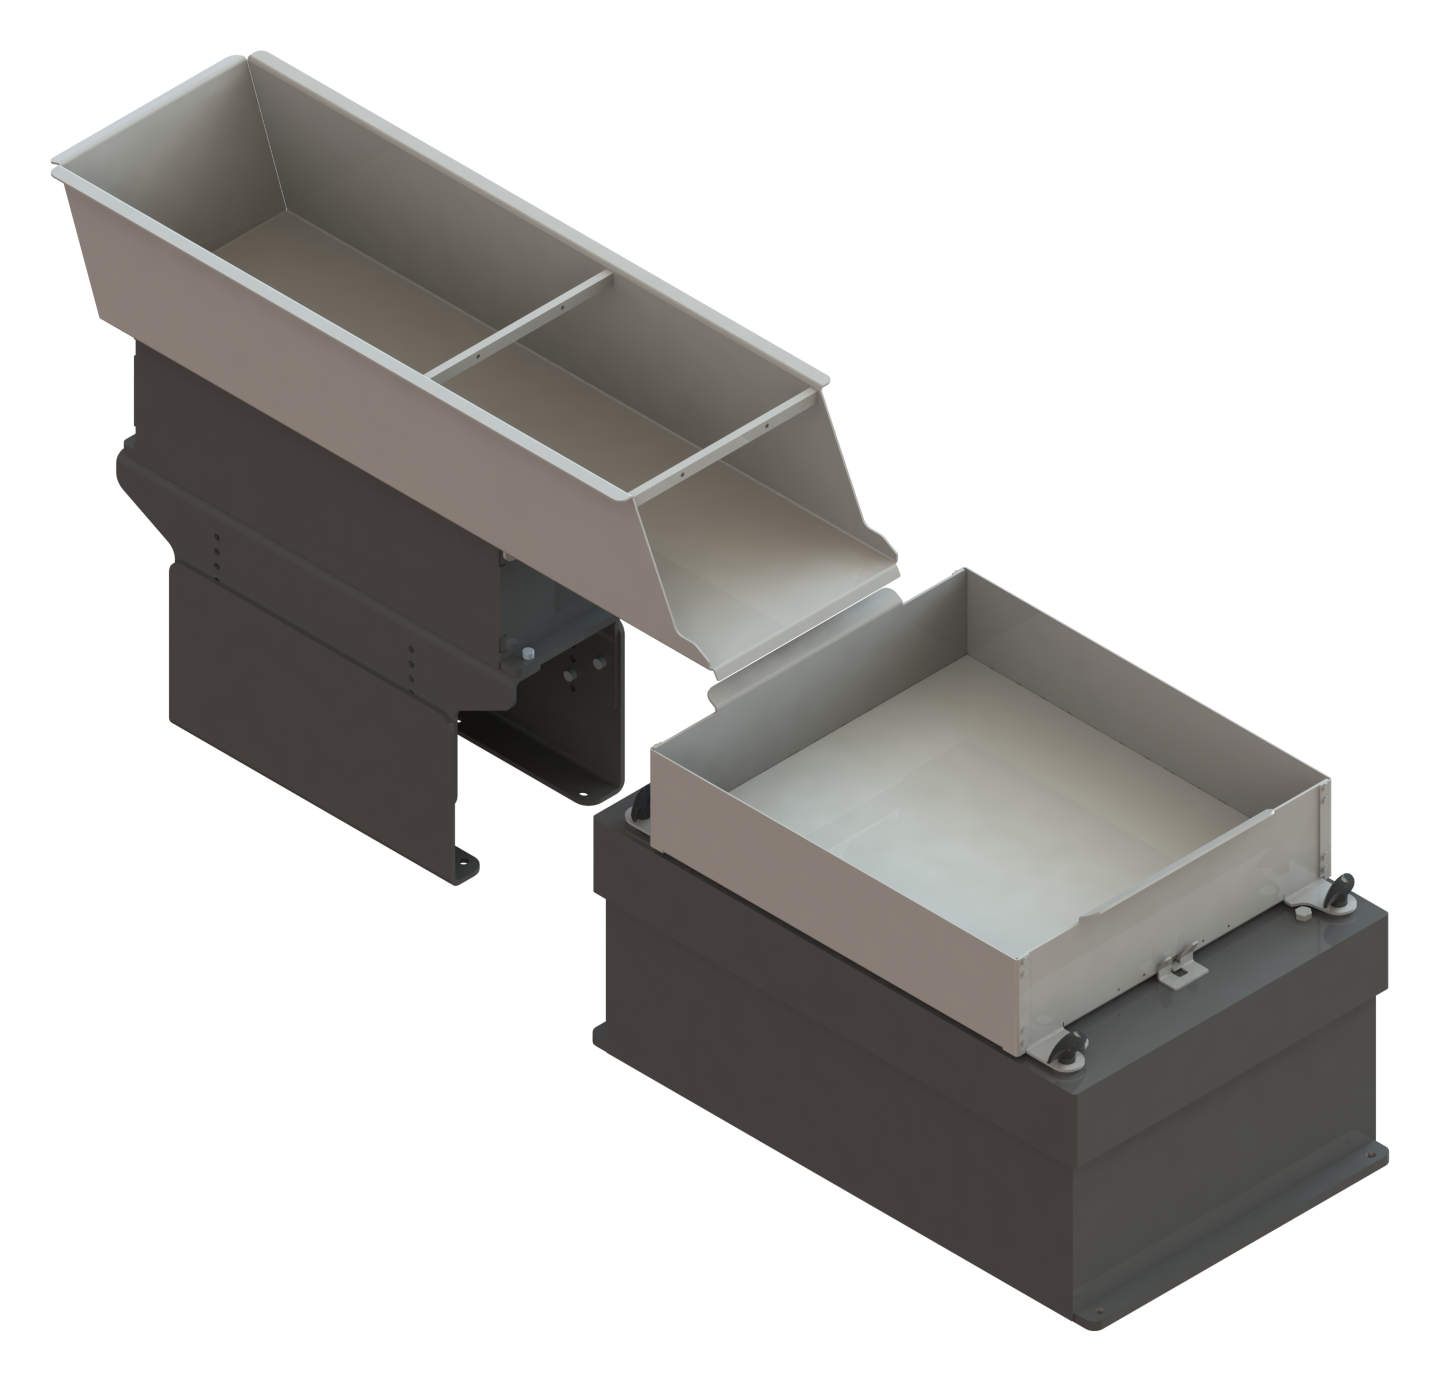
Fig. 14 Multi-feeding with two parts: Asycube 240 split with two Asyfill S 1L
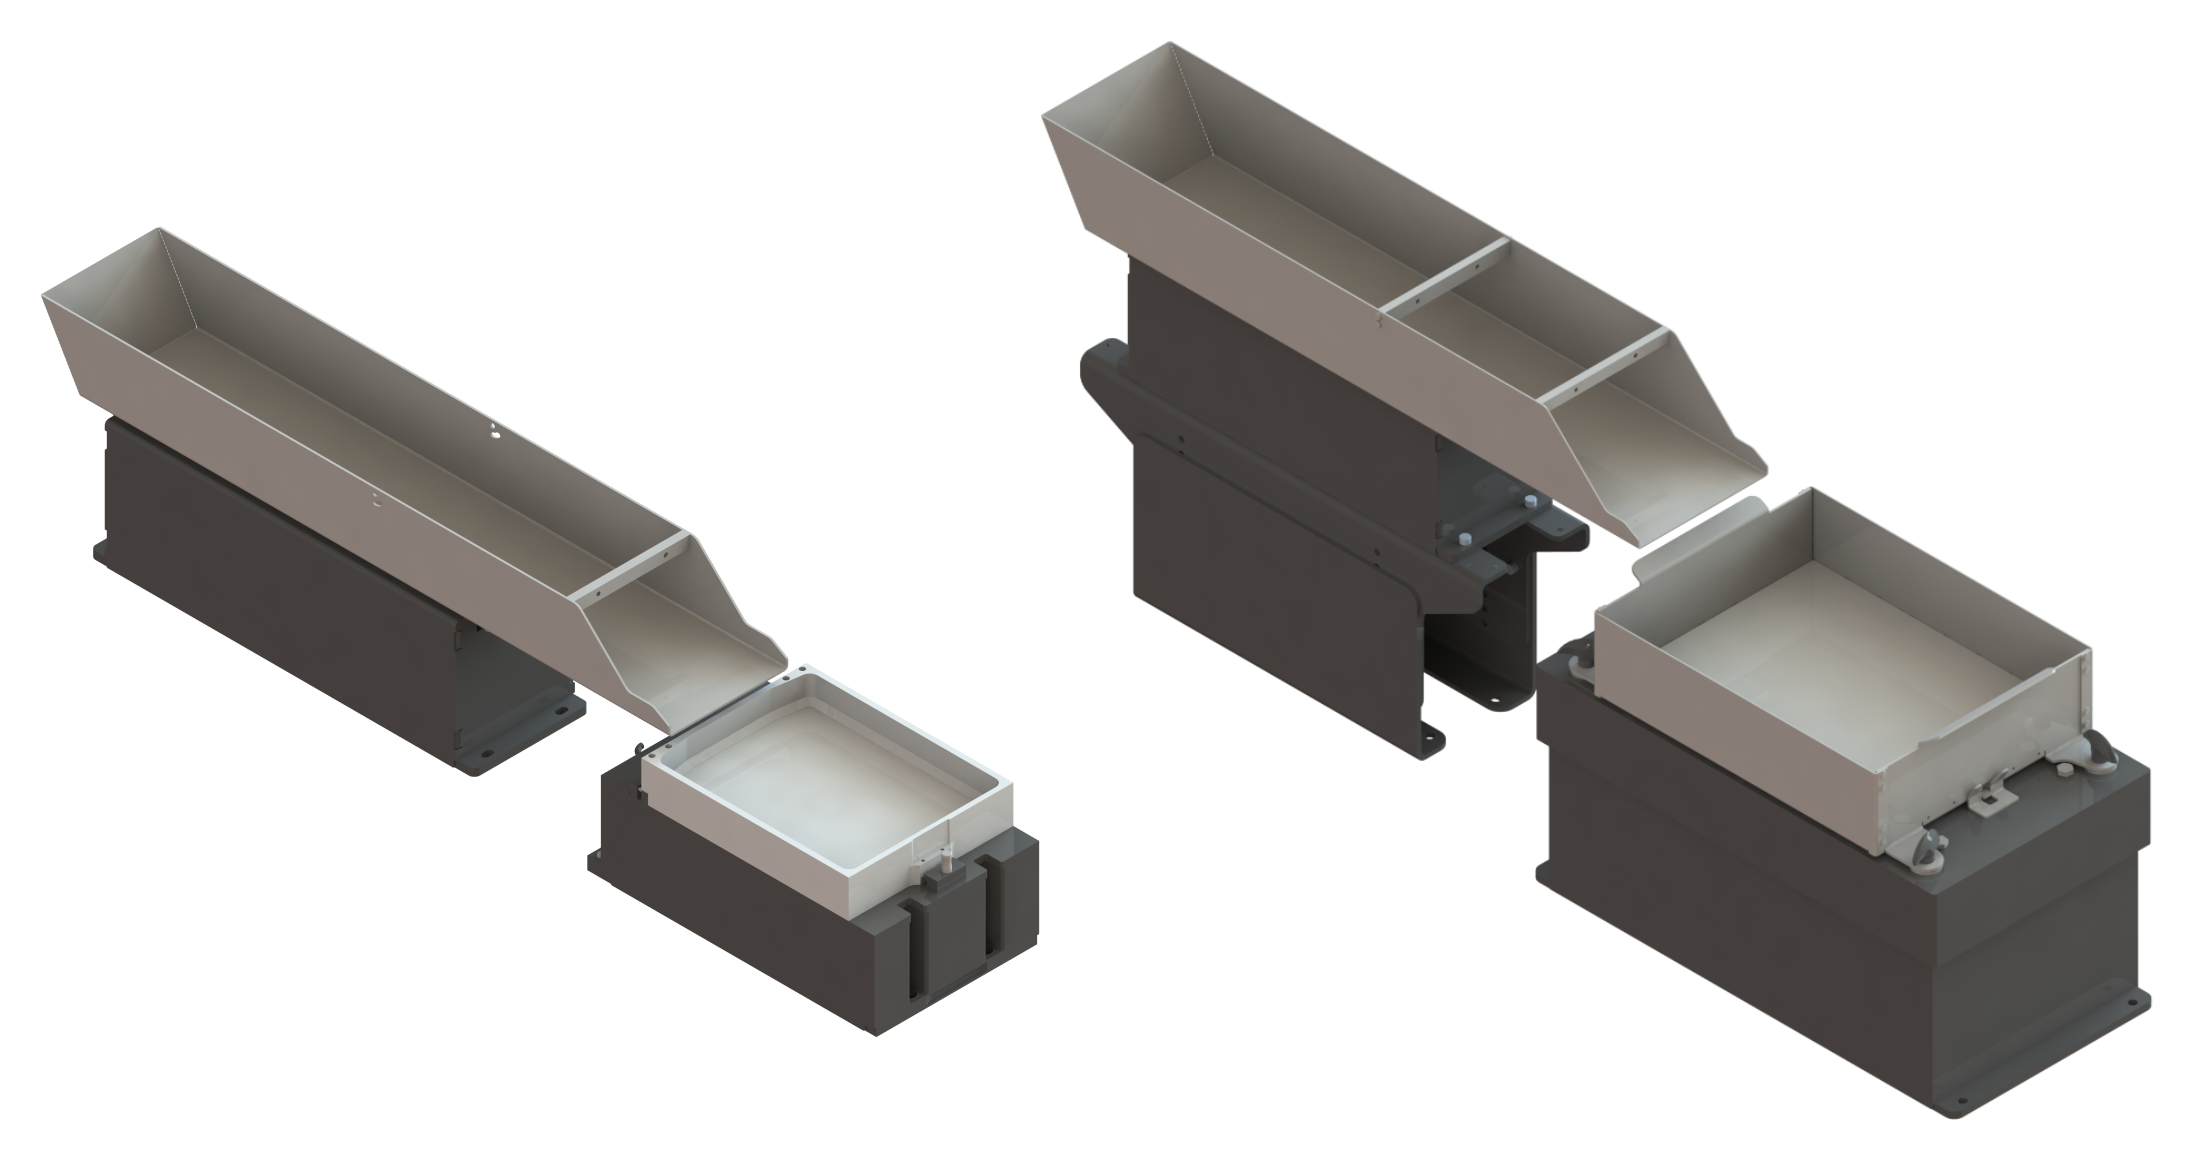
Fig. 15 Single part feeding: Asycube 240 with Asyfill M 3L (left) and Asycube 380 with Asyfill M 7L (right)
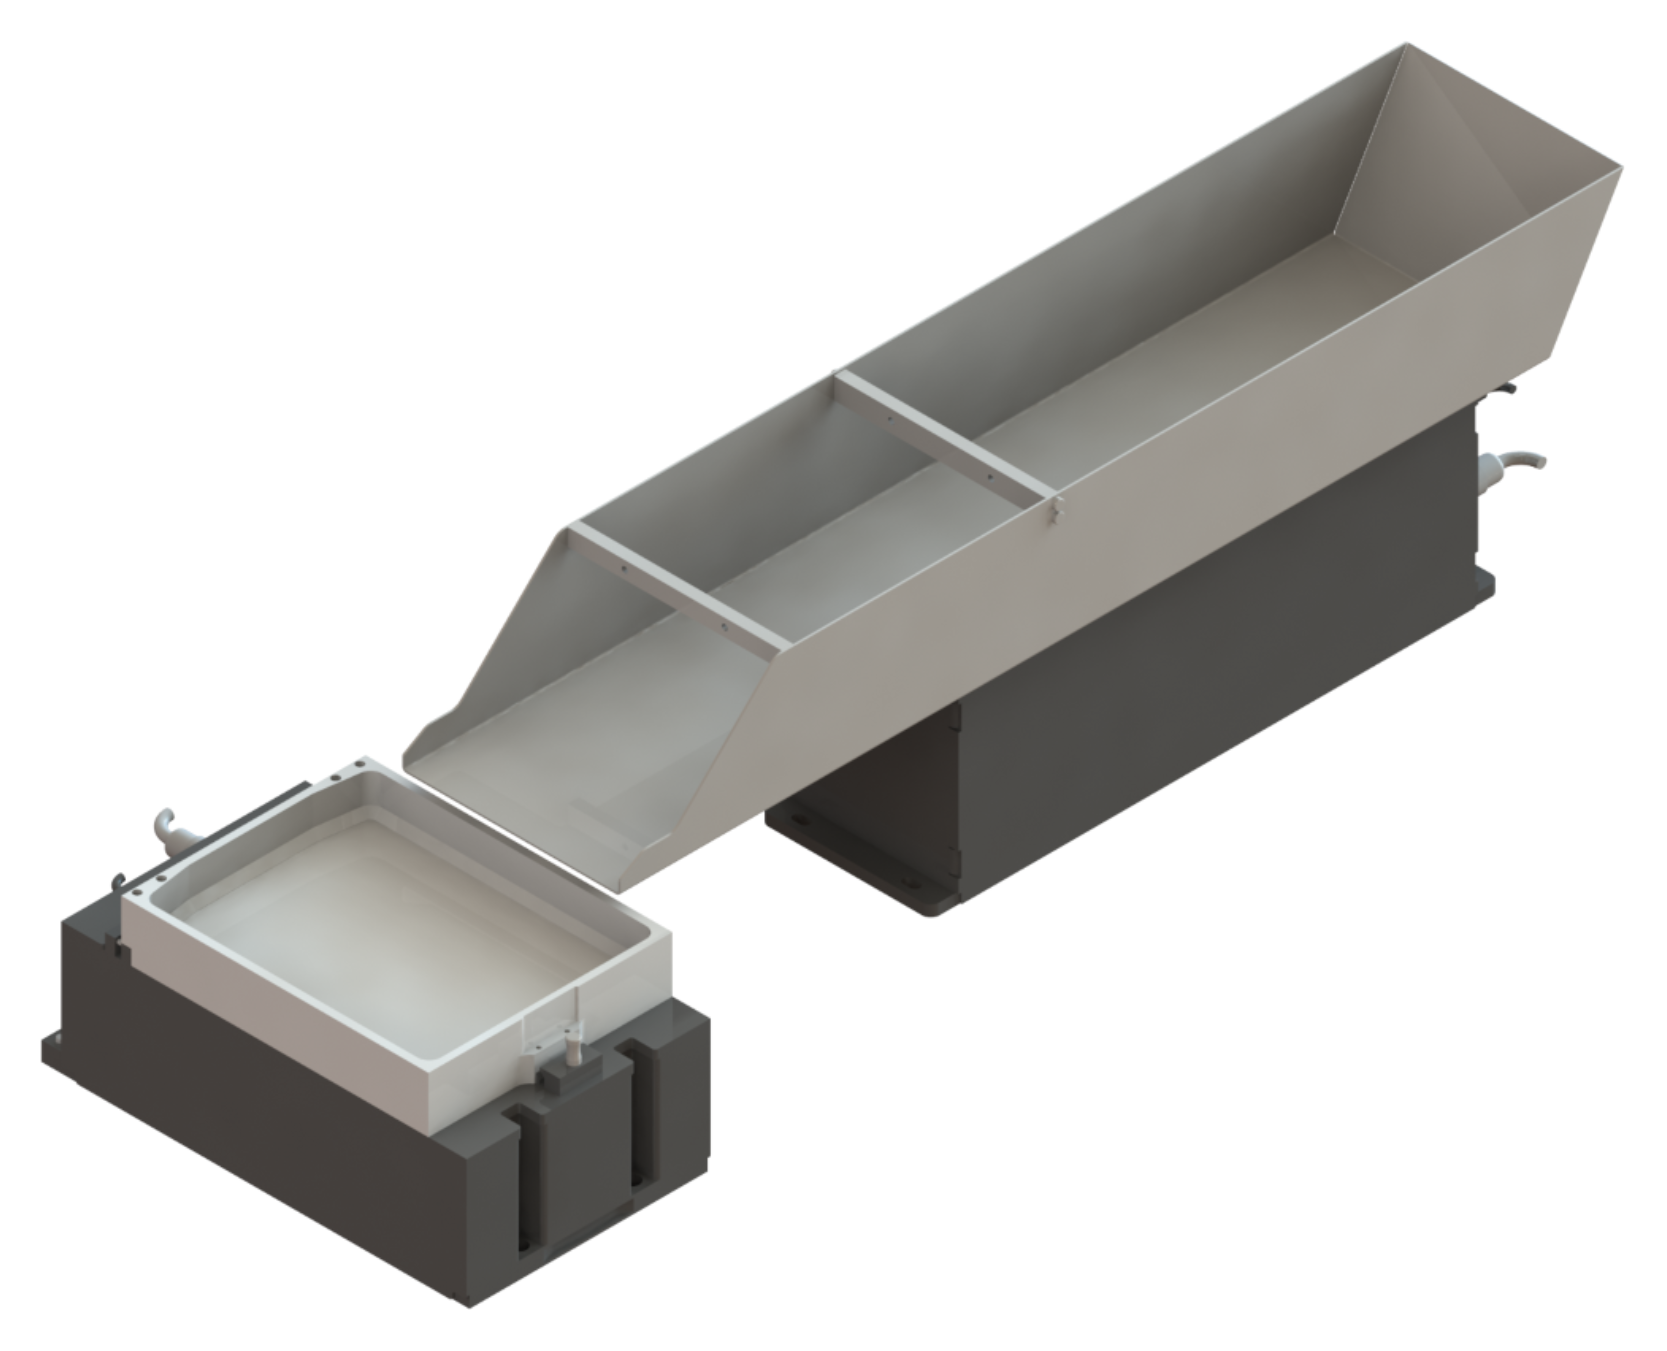
Fig. 16 Single part feeding on long side: Asycube 240 with Asyfill M 7L
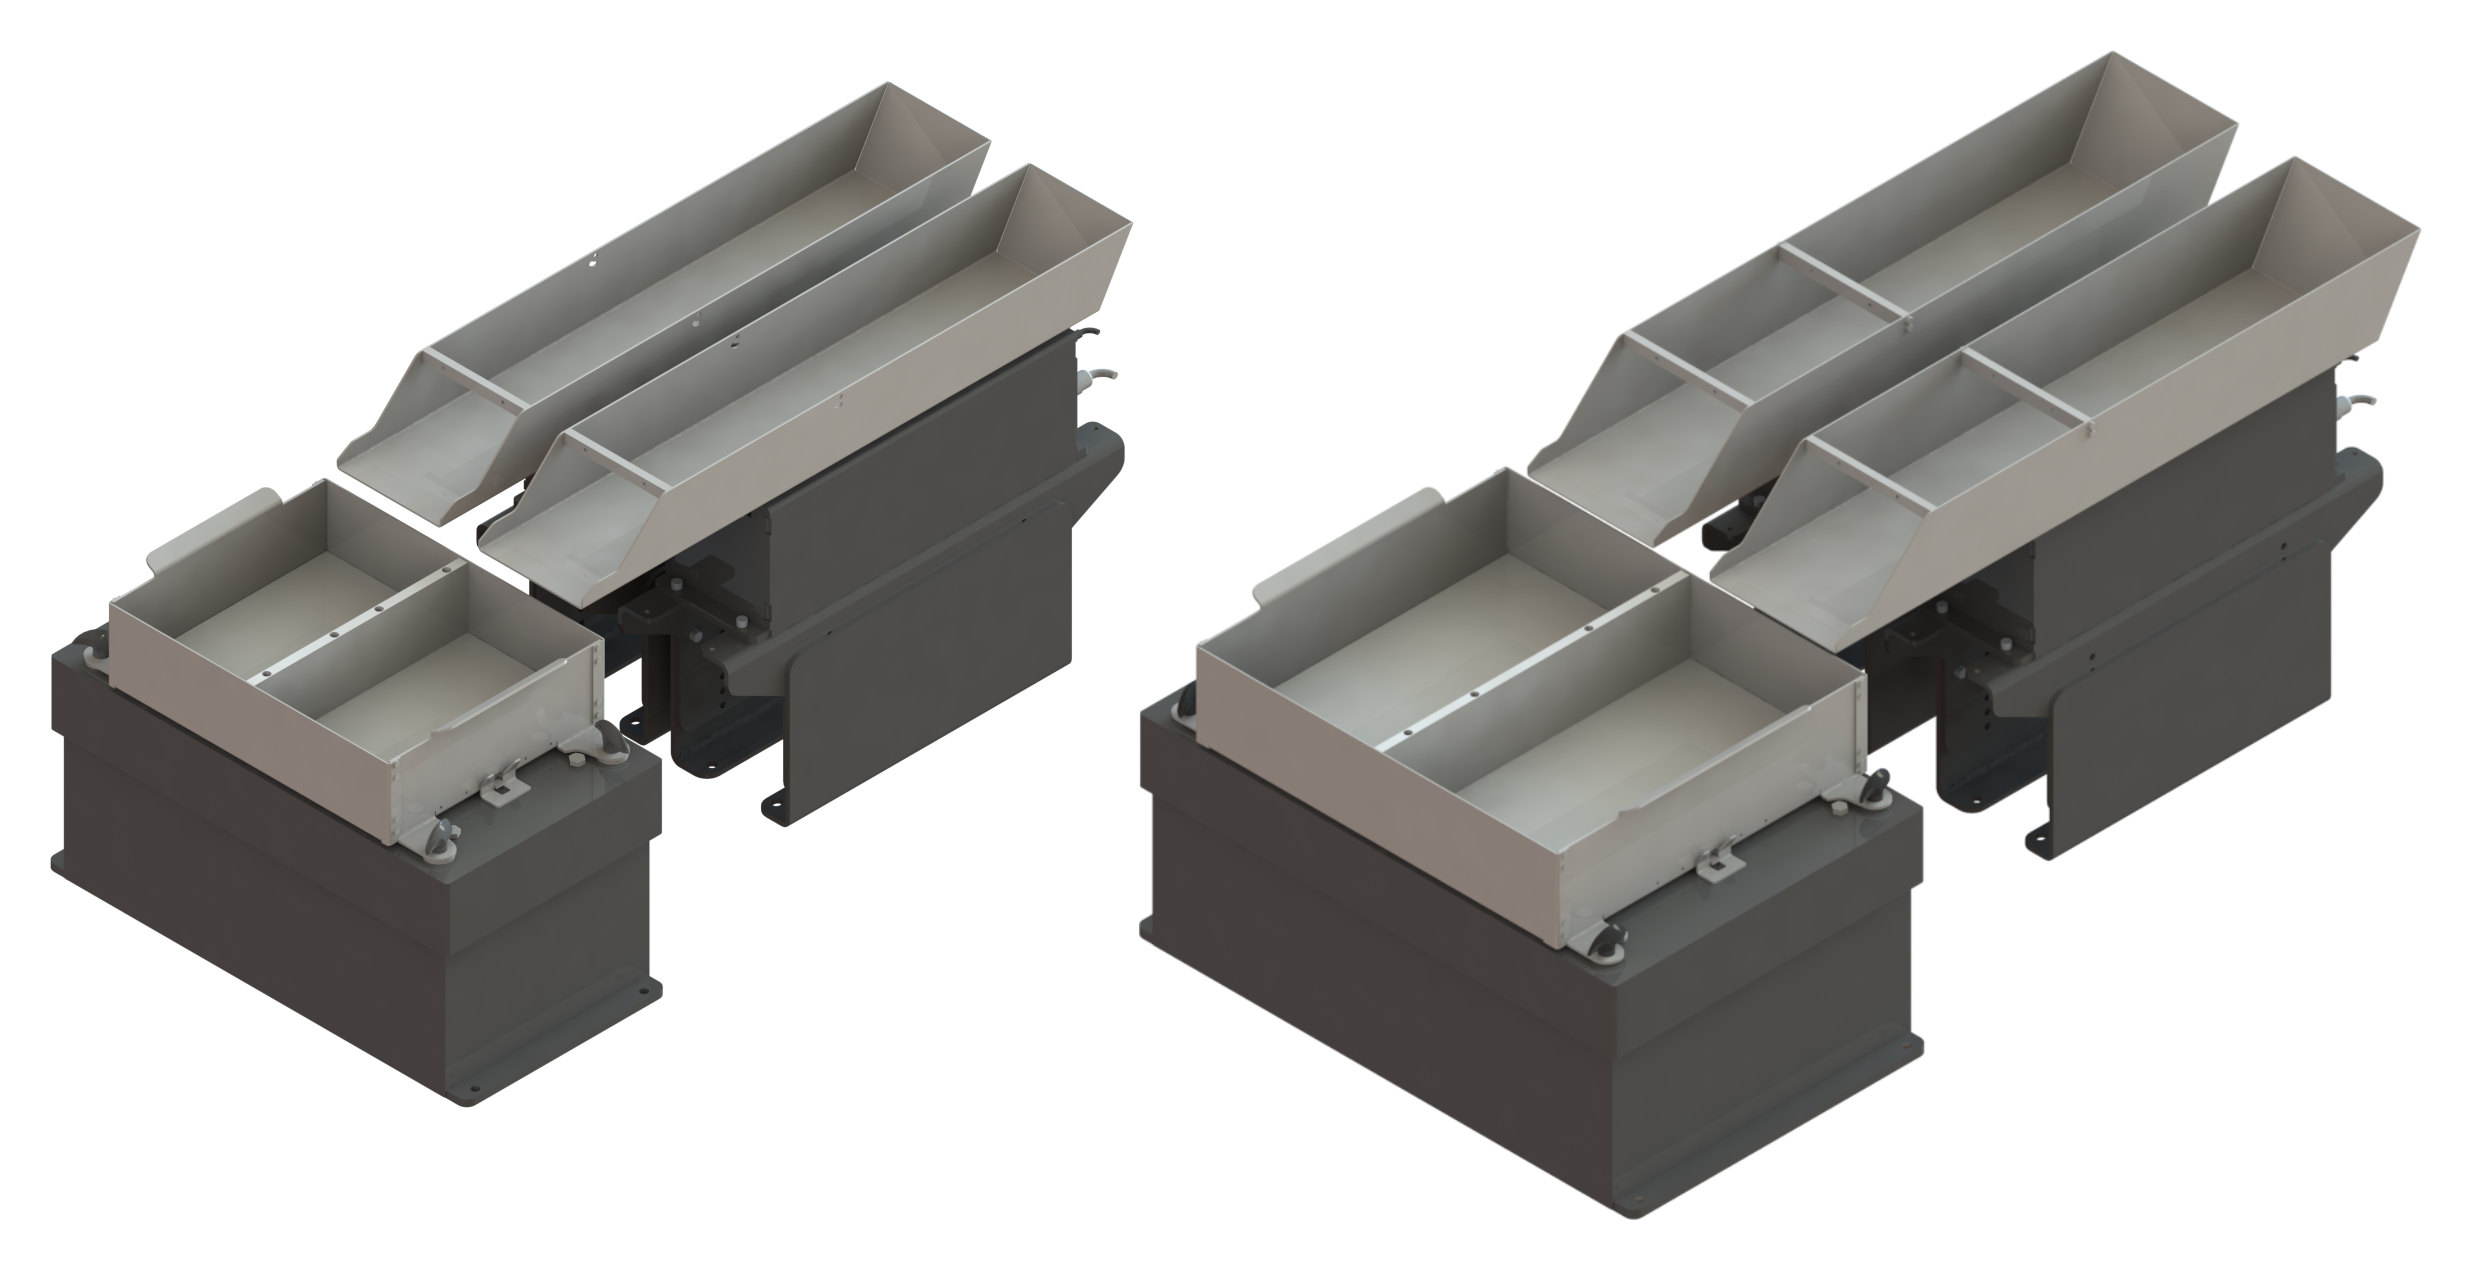
Fig. 17 Multi-feeding with two parts: Asycube 380 split with two Asyfill M 3L (left) and Asycube 530 split with two Asyfill M 7L (right)
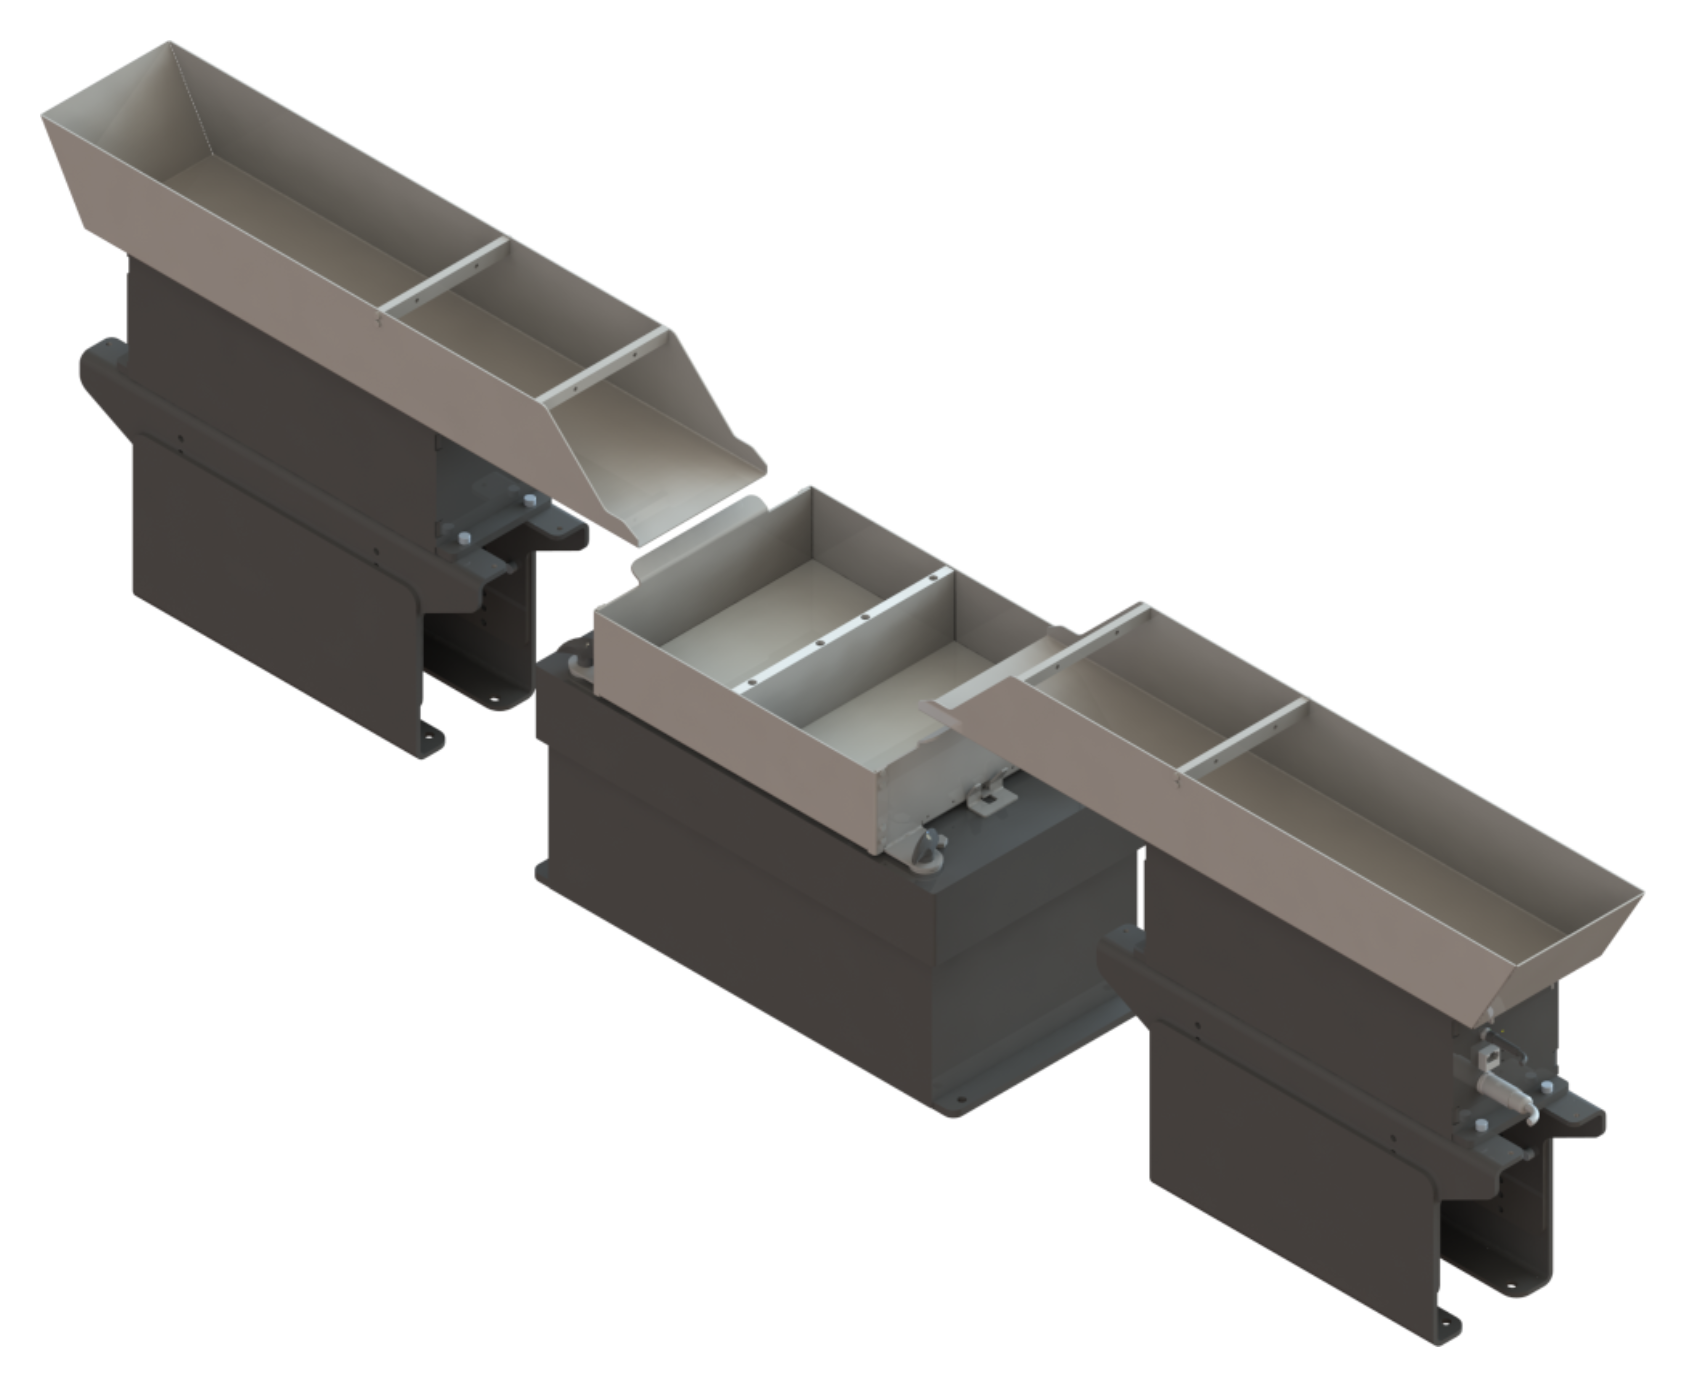
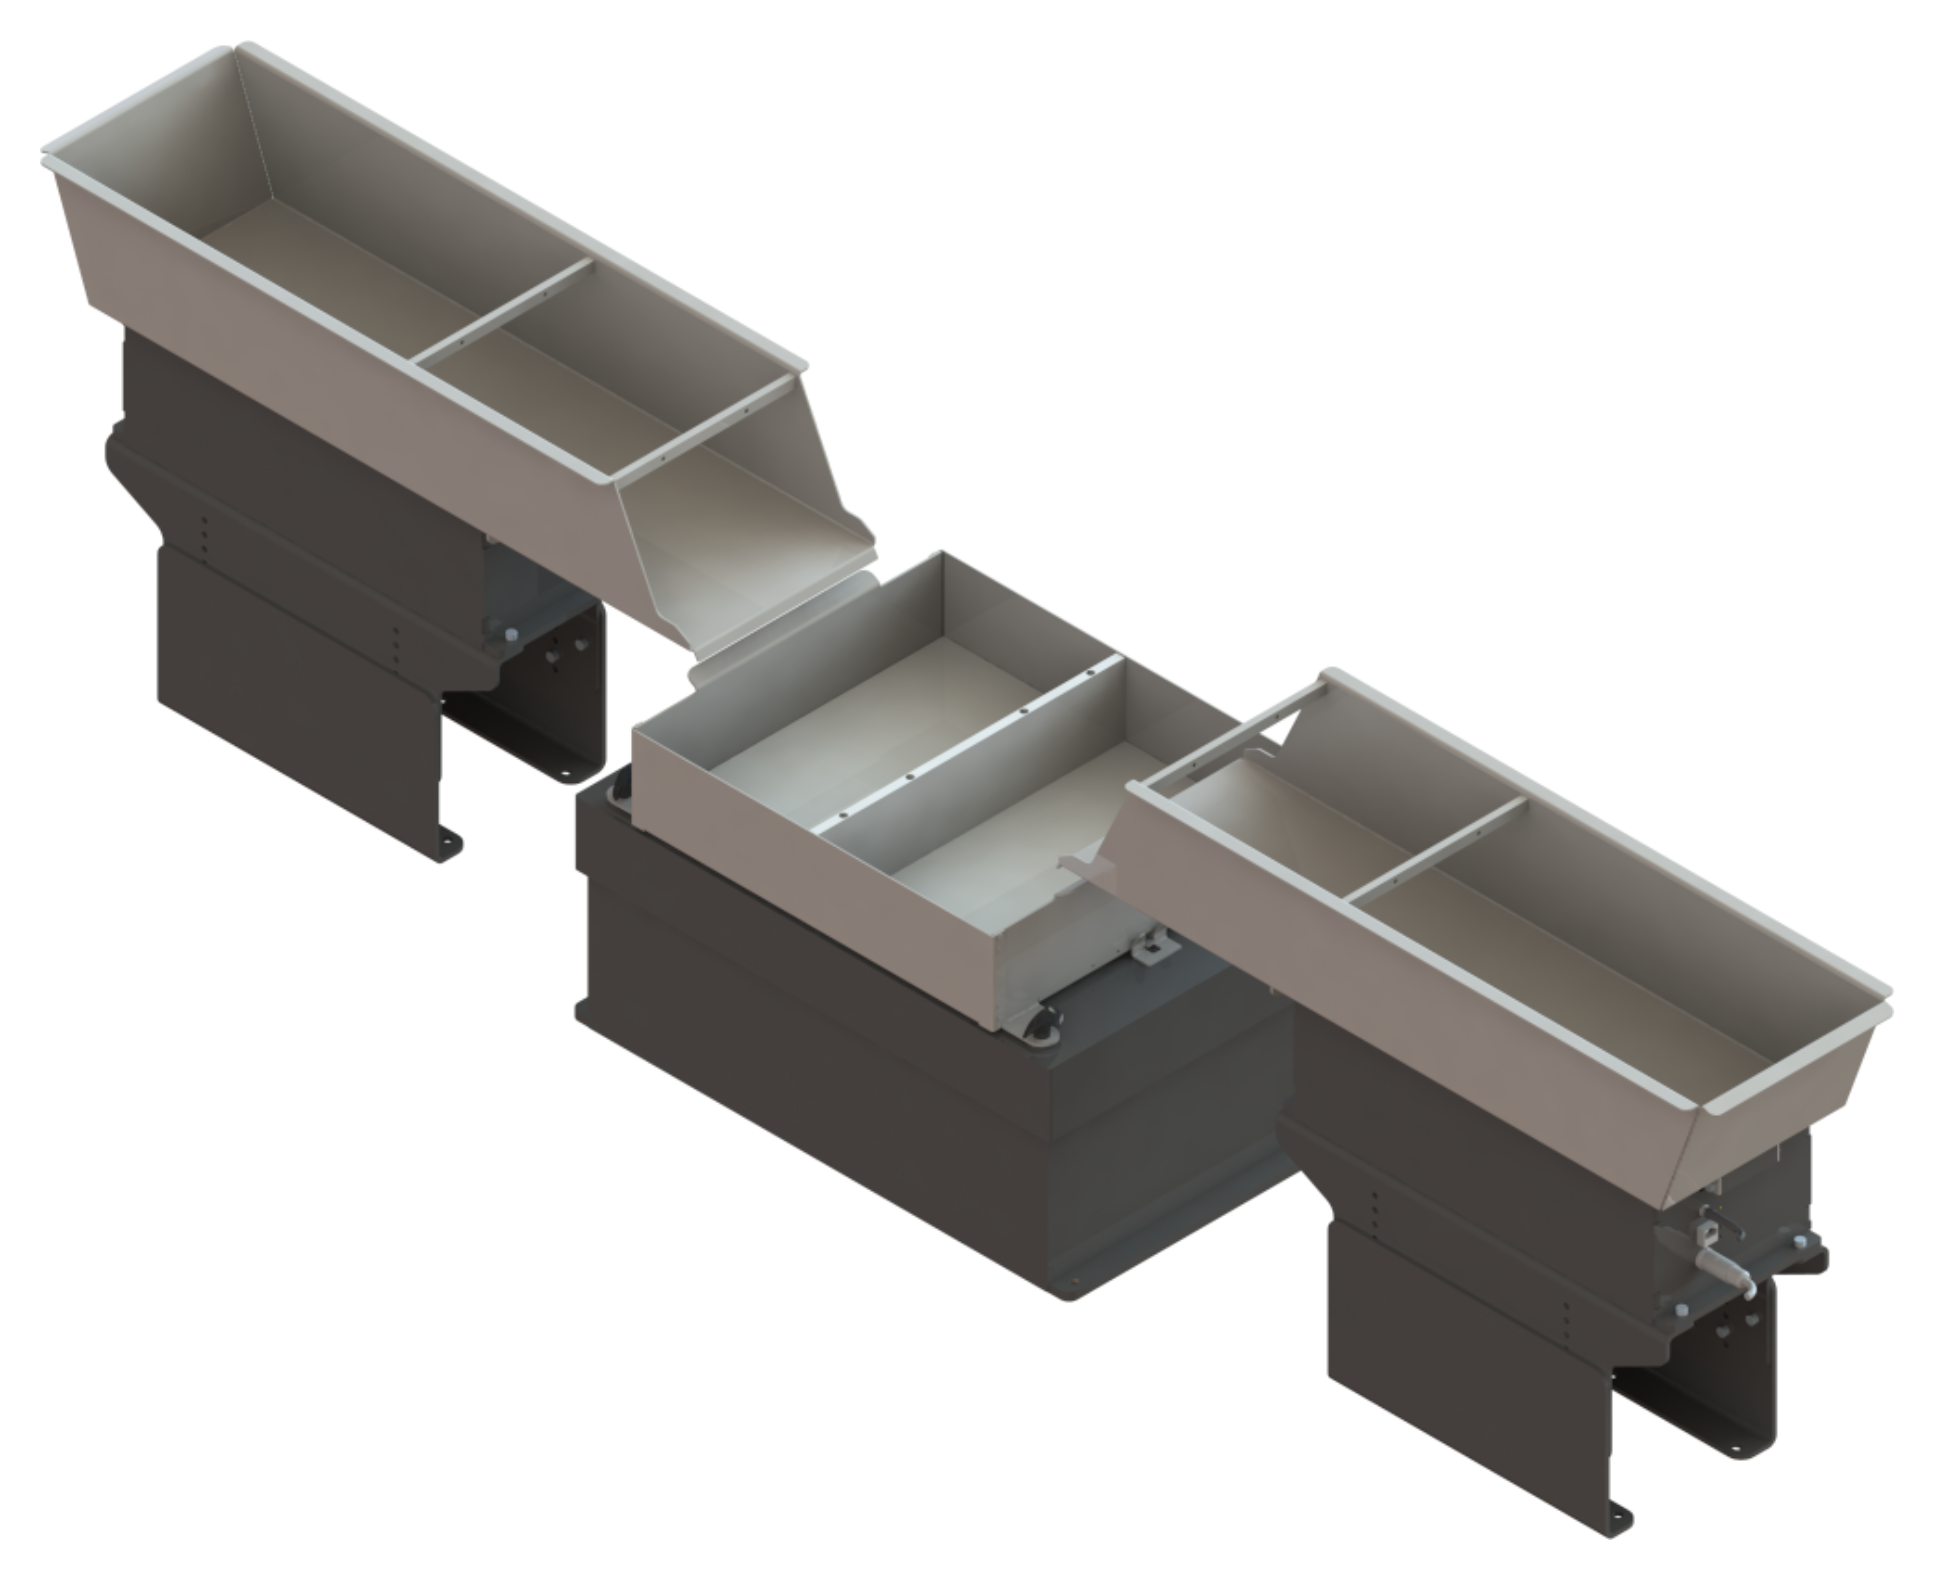
Fig. 18 Multi-feeding with two parts on different sides: Asycube 380 split with two Asyfill M 7L